Samsung S23 Calibration Guide | Screen, Battery, Sensors & Fingerprint
Samsung S23 Calibration Complete Guide for Every Sensor and Display Setting

What Is Samsung S23 Calibration and Why It Matters
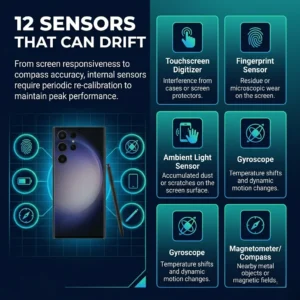
Samsung S23 calibration is the process of adjusting the device’s sensors, display, and hardware components to ensure they produce accurate, reliable, and consistent output. Every Samsung Galaxy S23, S23+, S23 Ultra, and S23 FE ships with factory-calibrated sensors but over time, software updates, physical impacts, screen replacements, and normal usage can shift those calibration baselines. When that happens, your touchscreen misregisters taps, your display colors look off, your battery percentage jumps unpredictably, or your fingerprint sensor fails repeatedly. Calibration corrects all of these issues by resetting each component back to its accurate operating baseline.
What most users don’t realize is that the Samsung S23 series contains at least twelve distinct sensors that can require calibration at different points in the device’s life the touchscreen digitizer, the under-display fingerprint sensor, the proximity sensor, the ambient light sensor, the accelerometer, the gyroscope, the magnetometer (compass), the barometer, the color spectrum sensor, the display panel itself, the battery management system, and the S Pen digitizer on the Ultra model. Each of these operates independently and can drift out of calibration for different reasons. A screen replacement affects the touchscreen and proximity sensor.
A software update can shift display color temperature. Extended use degrades battery reporting accuracy. Understanding which sensor needs attention and how to address it is what this guide covers completely.
The good news is that Samsung has built calibration tools directly into One UI. Most calibration tasks on the S23 series can be performed without any third-party applications and without visiting a service center. The hidden diagnostic menu accessible through the dialer gives access to hardware-level sensor tests and calibration routines that most users never discover. Combined with the display settings, motion and gestures settings, and battery management options available in the standard Settings app, you have everything needed to recalibrate the S23 to factory-accurate performance.
How Sensor Calibration Works on Android Devices
Android sensor calibration works through a combination of hardware baseline values stored in firmware and software correction layers applied by the operating system. When Samsung manufactures the S23, each unit goes through individual hardware calibration the sensors are tested against reference standards and the correction values that bring each sensor into specification are written into the device’s firmware. These stored values are what your device uses every time a sensor is accessed.
Over time, several things can shift these values. Physical shock from dropping the device can mechanically displace sensor components. Heat cycling from charging and discharging affects sensor baseline drift. Screen replacements, particularly non-OEM replacements, can introduce new touch panels with different sensitivity characteristics that don’t match the stored calibration values. Software updates occasionally reset or modify calibration parameters. When any of these events occur, the gap between the stored calibration baseline and the sensor’s actual current behavior creates the inaccuracies you experience.
Software-level calibration the kind accessible through One UI settings and Samsung’s diagnostic menu works by writing new correction values that compensate for the current sensor behavior. It doesn’t modify the hardware; it updates the software layer’s understanding of what the hardware is actually doing, bringing reported values back into alignment with reality.
When Should You Calibrate Your Samsung S23
You should calibrate your Samsung S23 when you notice specific, reproducible accuracy problems. Calibrate the display when colors appear washed out, too warm, or visibly inaccurate after a software update. Calibrate the touchscreen when taps are consistently misregistered, when the screen fails to respond in specific areas, or immediately after installing a screen protector. Calibrate the battery when the percentage jumps unexpectedly, when the device shuts down at 15% or higher, or when charge estimates are wildly inaccurate. Calibrate the fingerprint sensor when recognition fails more than 20% of the time with a clean, dry finger. Calibrate the proximity sensor after any screen replacement. Calibrate the gyroscope and accelerometer when gaming performance degrades or screen rotation behaves erratically.
Do not calibrate sensors that are working correctly. Unnecessary recalibration can introduce new inaccuracies by overwriting accurate baseline values. Calibrate in response to specific problems, not as routine maintenance.
Samsung Galaxy S23 Screen Calibration
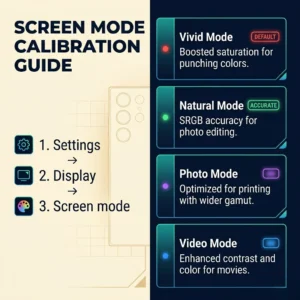
To calibrate the Samsung Galaxy S23 screen, go to Settings → Display → Screen mode and select Natural for the most color-accurate output. Fine-tune using the White balance slider under Advanced settings. For full manual control, use the Color balance sliders to adjust red, green, and blue channel intensity individually.
The Samsung Galaxy S23 uses a 6.1-inch Dynamic AMOLED 2X panel with a factory-calibrated display that covers 100% of the DCI-P3 color space. Despite this, the out-of-box screen mode on most S23 units is set to Vivid a mode that oversaturates colors for visual impact at the cost of color accuracy. For users who need accurate color reproduction for photo editing, video review, or general use that matches what content creators intended, switching to Natural mode and then fine-tuning the white balance settings brings the display into accurate calibration.
Samsung’s screen calibration system works through the Color balance tool in Advanced settings, which adjusts the display panel’s color output at the driver level. The three sliders Cool, Neutral, and Warm for the quick adjustment, or individual Red, Green, and Blue channel sliders for precise control modify the panel’s color temperature and tint. These adjustments are applied in real time and can be refined until the display matches a reference standard or personal preference.
For users experiencing color accuracy issues after a software update, the most effective first step is resetting the display settings to default and then re-calibrating from scratch. Software updates on the S23 series occasionally reset display parameters or modify the rendering pipeline in ways that shift the calibrated white point. Resetting and recalibrating takes less than five minutes and resolves the majority of post-update color complaints.
Adjusting Display Color Mode and White Balance
The Samsung Galaxy S23 offers four display modes accessible through Settings → Display → Screen mode: Vivid, Natural, Photo, and Video. Each mode applies a different color profile to the panel, and understanding what each does helps you make the right calibration choice for your use case.
Vivid mode pushes saturation beyond the sRGB color space, making colors appear punchy and visually impressive but technically inaccurate. This is Samsung’s default setting because it looks impressive in retail environments, but it’s the worst choice for accurate color work. Natural mode targets the sRGB color space and produces colors closest to what content creators and designers intended when they made the images and videos you consume. Photo mode is calibrated for the DCI-P3 color space used in cinema content and is the best choice for watching HDR video. Video mode targets the same space as Photo but adjusts the rendering for motion content specifically.
For white balance calibration within your chosen mode, tap Advanced settings below the Screen mode selector. The basic slider moves between Cool (bluer) and Warm (more yellow-orange) with a Neutral midpoint. If your display appears too blue after a software update, move the slider toward Warm. If it appears too yellow, move it toward Cool. For users who want precise control, tap the expansion arrow to reveal individual Red, Green, and Blue sliders. Setting equal values across all three channels produces a neutral white point. Increasing red and decreasing blue produces warmer whites. The reverse produces cooler whites.
How to Fix Color Accuracy Issues on Samsung S23 Display
Color accuracy issues on the Samsung S23 display fall into four common patterns, each with a specific fix. A yellowish or overly warm tint after a software update is resolved by going to Settings → Display → Screen mode → Advanced settings and moving the white balance slider toward Cool by one or two notches. A washed-out, low-saturation appearance usually means the display was accidentally switched to Natural mode when the user expected Vivid switch back to Vivid or adjust the saturation slider in Vivid’s Advanced settings.
A green tint in dark scenes, which is a known characteristic of some AMOLED panels at low brightness, is partially addressed by enabling the Eye comfort shield feature and adjusting its intensity. Uneven brightness or color uniformity issues where one area of the screen appears brighter or differently colored than adjacent areas indicate a hardware problem that calibration cannot resolve and requires service.
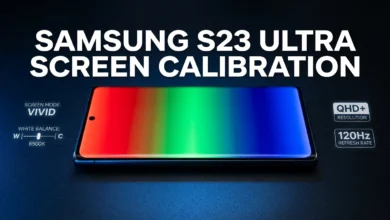
Samsung S23 Ultra Screen Calibration
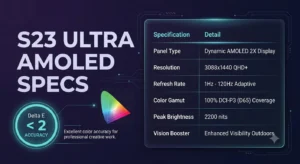
To calibrate the Samsung S23 Ultra screen, navigate to Settings → Display → Screen mode, select Natural for accurate colors, then tap Advanced settings and adjust the White balance and individual RGB channel sliders until the display matches your reference standard. The S23 Ultra’s larger 6.8-inch QHD+ panel requires more careful calibration than the standard S23 due to its higher resolution and wider color gamut coverage.
The Samsung S23 Ultra features a 6.8-inch Dynamic AMOLED 2X panel with QHD+ resolution (3088 × 1440 pixels) and a variable refresh rate between 1Hz and 120Hz. Its display is factory-calibrated to achieve Delta E values under 2 the professional threshold for color accuracy but this calibration assumes Natural mode is active. When using Vivid mode, the S23 Ultra’s display deliberately exceeds these accuracy thresholds to maximize visual impact. Understanding this distinction is essential for anyone who relies on the S23 Ultra’s display for professional image work.
The S23 Ultra also introduces one calibration feature not available on other S23 models: Vision booster. This adaptive mode adjusts display output based on ambient light levels detected by the color spectrum sensor, modifying both brightness and color rendering to maintain readability and color accuracy in varying lighting conditions. Vision booster is technically a real-time calibration adjustment it continuously updates the display’s output to compensate for environmental conditions. Enable it through Settings → Display → Vision booster.
Natural vs Vivid Display Mode — Which Is More Accurate
Natural mode is more color accurate. Vivid mode is more visually impressive. This distinction matters enormously depending on what you use the S23 Ultra for. Natural mode targets the sRGB color space and produces Delta E values under 2 when properly white-balance calibrated meaning the display is producing colors within the professional threshold of accuracy against the standard reference. Vivid mode deliberately expands beyond sRGB, pushing saturation to approximately 140% of the standard, making reds more saturated, greens more vibrant, and blues more intense than the source content actually contains.
For social media consumption, gaming, and general entertainment, Vivid mode looks better subjectively. For photography review, video editing, graphic design, or any context where color accuracy matters professionally, Natural mode is the only appropriate choice. If you edit photos on your S23 Ultra and review them in Vivid mode, every image you approve is actually less saturated than what you’re seeing which means your edits will appear washed out on calibrated monitors and prints.
Calibrating AMOLED Display for True-to-Life Colors
Calibrating the S23 Ultra’s AMOLED panel for true-to-life colors requires three steps. First, set the display to Natural mode. Second, set the white balance to Neutral using the basic slider this removes any warm or cool bias and gives you a neutral starting point. Third, view a reference image a gray scale test chart or a known reference photo and make fine adjustments using the RGB sliders until the display matches your reference as closely as possible.
A practical calibration reference available to any user is the gray scale test. Find a neutral gray image one with equal R, G, and B values around 128,128,128 and view it on the S23 Ultra in Natural mode. If the gray appears warm, reduce the Red slider slightly. If it appears cool, reduce the Blue slider slightly. If it appears green-tinted, reduce the Green slider. When the gray appears genuinely neutral, your white point is calibrated, and all other colors rendered in Natural mode will be substantially more accurate than the factory default Vivid setting.
Samsung S23 Touch Screen Calibration
Samsung removed the dedicated touchscreen calibration option from One UI 5 and later versions. To calibrate the Samsung S23 touchscreen, access the hidden diagnostic menu by dialing #0# in the Phone app, then select Touch to run a touch zone test. For sensitivity adjustment, go to Settings → Display → Touch sensitivity and toggle it on for use with screen protectors.
The Samsung Galaxy S23’s touchscreen uses a capacitive multi-touch digitizer capable of registering up to ten simultaneous touch points at 240Hz touch sampling rate. This digitizer is factory-calibrated to respond accurately to bare finger touches anywhere on the display surface. When touch accuracy problems occur misregistered taps, unresponsive zones, or phantom touches the cause is almost always one of four things: a screen protector that alters the capacitive field, a software conflict, physical damage to the digitizer, or contamination on the screen surface.
Before attempting any calibration procedure, clean the screen surface with a microfiber cloth to eliminate contamination as a variable. If you are using a screen protector, enable Touch sensitivity mode under Settings → Display → Touch sensitivity. This increases the digitizer’s sensitivity threshold to compensate for the reduced capacitive transmission through the protector’s additional layer. Without this setting, thick tempered glass screen protectors will cause the S23 to misregister or ignore light touches.
How to Adjust Touchscreen Sensitivity on Samsung S23
Touchscreen sensitivity adjustment on the Samsung S23 is accessed through Settings → Display → Touch sensitivity. Enabling this toggle increases the screen’s responsiveness to accommodate gloves, screen protectors, or situations where reduced finger contact area is reducing registration accuracy. This is the primary software-level sensitivity calibration available through standard One UI settings.
For deeper sensitivity testing and diagnostics, the hidden service menu provides additional tools. Dial #0# from the Phone app to access the hardware test menu. Select Touch from the available options. The touch test screen displays a grid drag your finger across every section of the grid to test that every zone registers correctly. Any zone that fails to respond indicates either a dead spot in the digitizer requiring hardware service, or a calibration issue addressable through the service menu’s more advanced diagnostic tools.
For users experiencing touch drift where the registered touch point appears slightly offset from the actual finger position this is typically caused by a non-OEM replacement screen whose digitizer offset values don’t match the stored calibration. This requires professional recalibration using Samsung’s service software or replacement with an OEM panel.
How to Recalibrate Touchscreen After Screen Protector Installation
After installing a screen protector on the Samsung S23, follow these steps in sequence to restore accurate touch response. First, ensure the screen protector is applied without air bubbles bubbles create inconsistent capacitive fields that produce random misregistration regardless of sensitivity settings. Second, enable Touch sensitivity in Settings → Display → Touch sensitivity. Third, restart the device to allow the OS to reinitialize touch parameters with the new sensitivity setting active. Fourth, test touch accuracy across the full screen surface using the #0# diagnostic menu’s touch test.
If touch accuracy is still poor after these steps, the screen protector may be too thick for the S23’s capacitive technology to compensate for. The S23’s touch sensitivity mode has limits it can compensate for protectors up to approximately 0.4mm thickness. Ultra-thick privacy screen protectors or those with metallic privacy layers can block capacitive transmission entirely, making no amount of software sensitivity adjustment effective. In these cases, the protector is incompatible and must be replaced with a thinner alternative.
Samsung S23 Color Calibration
To perform color calibration on the Samsung S23, go to Settings → Display → Screen mode → Advanced settings. Select Natural mode, then use the White balance slider for quick adjustment or expand to individual Red, Green, and Blue sliders for precise color channel calibration. For outdoor visibility optimization, enable Adaptive brightness and Vision booster (S23 Ultra) or Auto brightness (standard S23).
Color calibration on the Samsung S23 series addresses two distinct aspects of display accuracy: white balance (the color temperature of neutral tones) and color gamut (the range and intensity of saturated colors). These two dimensions interact a correctly set white balance in Vivid mode still produces oversaturated colors because the gamut is extended by design. True color calibration requires both setting the appropriate color mode for your use case and then fine-tuning the white balance within that mode.
The S23’s color spectrum sensor, located at the top of the device alongside the front camera, continuously samples the ambient light’s color temperature and can be used to automatically adjust the display’s white balance to match environmental conditions. This feature is separate from the manual calibration settings and operates as a real-time compensation layer. Enable it through Settings → Display → Adaptive color tone. When active, it adjusts the display’s warmth and coolness in response to the surrounding light making the screen appear warmer under incandescent lighting and cooler under daylight.
Some users mistake this automatic adjustment for display drift and attempt manual recalibration, when the correct response is simply to disable Adaptive color tone and then assess the display’s static accuracy.
White Balance and Color Temperature Adjustment
White balance calibration on the S23 operates on the Kelvin color temperature scale, though Samsung presents this as a visual slider rather than numeric values. The Cool end of the Samsung white balance slider corresponds approximately to 6500K daylight, the Neutral midpoint to 6000K, and the Warm end to approximately 5000K. For users who need to match a specific color temperature target for example, 6500K D65 which is the standard for digital content mastering setting the slider to Cool in Natural mode produces the closest match.
Professional color temperature calibration on the S23 series benefits from comparison against a physical reference. If you have access to a calibrated monitor, use it as your reference and adjust the S23’s display settings until matching images appear visually consistent between both screens. This side-by-side method, while less precise than using a colorimeter, produces substantially more accurate results than adjusting by eye without a reference.
Optimal Display Settings for Photo Editing and Outdoor Use
For photo editing, the optimal Samsung S23 display calibration is: Screen mode set to Natural, white balance set to Neutral, adaptive brightness off (manual brightness set to 70-80% in a controlled lighting environment), and Adaptive color tone disabled. These settings produce the most accurate, consistent display output for evaluating image color and exposure. Enable HDR video under Advanced settings to ensure HDR-encoded photos are rendered with correct tone mapping.
For outdoor use in direct sunlight, the optimal settings shift: maximum brightness, Adaptive brightness enabled to maintain output as ambient light changes, and Vivid mode to maximize perceived contrast and saturation against the visual noise of bright environments. The S23 Ultra’s Vision booster provides an additional outdoor optimization layer specifically designed for direct sunlight legibility.
Samsung Galaxy S23 Battery Calibration
To calibrate the Samsung Galaxy S23 battery, drain the battery completely until the device powers off automatically, then charge it uninterrupted to 100% without using the device during charging. Repeat this cycle two to three times to reset the battery management system’s capacity tracking. For persistent percentage inaccuracy, go to Settings → Battery and device care → Battery and disable all optimization features temporarily.
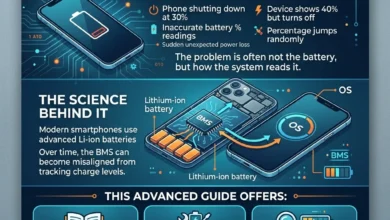
Battery calibration on the Samsung Galaxy S23 addresses a specific problem: the gap between what the battery management system reports as remaining charge and the battery’s actual remaining capacity. This gap develops over time as the battery’s maximum capacity decreases with charge cycles, while the management system’s stored capacity model becomes outdated. The reported percentage is calculated against the stored model, not against the battery’s current actual capacity which is why a battery reporting 20% might shut down immediately, or one reporting 5% might run for another 30 minutes.
The Galaxy S23 uses a 3900mAh battery managed by Samsung’s Adaptive battery system. This system learns usage patterns and adjusts charge and discharge management accordingly it is a sophisticated battery management implementation that, under normal conditions, maintains accurate reporting. Battery calibration becomes necessary when the device has been fully discharged to zero repeatedly in ways that disrupt the management system’s learned model, or after a major software update that modifies battery management parameters.
How to Recalibrate Battery Percentage on Samsung S23
The battery percentage recalibration procedure for the Samsung S23 involves four steps that reset the battery management system’s capacity model. First, use the device normally until the battery drains completely and the device powers off on its own do not manually power it off at any point, as this prevents the management system from accurately recording the true low-capacity endpoint. Second, connect the original Samsung charger or a certified 25W USB-PD charger and charge the device to 100% without interruption. Third, leave the device plugged in for an additional 30 minutes after reaching 100% to allow trickle charging to complete fully. Fourth, restart the device to allow the battery management software to reinitialize with the updated capacity model.
Repeat this complete cycle two to three times over several days for the most accurate recalibration. After the third cycle, the battery percentage reporting should align closely with actual remaining capacity, and estimated battery life in the battery settings should reflect realistic usage patterns.
Does a Full Battery Cycle Reset Improve Battery Health
A full battery cycle reset draining completely to zero and charging fully to 100% improves the accuracy of battery percentage reporting but does not improve the battery’s actual physical health or maximum capacity. These are two separate things that users frequently confuse. Battery health, measured as the percentage of original maximum capacity the battery can still hold, is determined by the battery’s physical condition the number of charge cycles completed, whether it has been exposed to heat stress during charging, and whether it has been deep-discharged repeatedly. No software calibration procedure reverses chemical degradation in a lithium-ion cell.
What the full cycle reset does do is recalibrate the battery management system’s model of the battery’s capacity, bringing the reported percentage back into alignment with actual remaining charge. This makes the reported percentage more accurate and makes shutdown events at unexpected charge levels less likely. For a Samsung S23 whose battery percentage has been consistently reporting inaccurately, this procedure is worth performing before considering battery replacement.
Samsung S23 Ultra Battery Calibration
To calibrate the Samsung S23 Ultra battery, drain to zero and charge to 100% in two to three complete cycles using the original 45W charger. Additionally, check Settings → Battery and device care → Battery → More battery settings and ensure Protect battery (which limits charging to 85%) is disabled during the calibration process re-enable it after calibration is complete.
The Samsung Galaxy S23 Ultra carries a larger 5000mAh battery compared to the standard S23’s 3900mAh, but the calibration principles and procedure are identical. The S23 Ultra adds one complication: the Protect battery feature, which limits maximum charge to 85% to extend long-term battery lifespan. If this feature is enabled during a calibration cycle, the battery management system treats 85% as the effective maximum, which can confuse the calibration process and produce inaccurate percentage reporting at the top of the charge range.
For calibration purposes, disable Protect battery in Settings → Battery and device care → Battery → More battery settings before beginning the calibration cycles. Run the complete drain-and-full-charge cycles with Protect battery off. Once calibration is complete and percentage reporting is accurate, re-enable Protect battery if you want to prioritize long-term battery health over charging convenience.
How to Check Battery Health on Samsung S23 Ultra
Samsung does not expose battery health percentage through the standard One UI settings on the Galaxy S23 Ultra unlike iOS which shows battery health directly in settings. To check battery health on the Samsung S23 Ultra, use the hidden diagnostic code. Open the Phone app and dial *#0228# to access the battery information screen. This screen displays the battery’s current voltage, temperature, and critically, the ADC (Analog to Digital Conversion) value, which reflects the current charge state and management system parameters.
For a more comprehensive battery health assessment including cycle count and capacity degradation percentage, use Samsung Members app → Get Help → Interactive checks → Battery. This test runs a diagnostic and reports the battery’s current maximum capacity as a percentage of its original design capacity. A reading above 80% is considered good. Below 80% indicates the battery has degraded to a point where replacement would meaningfully improve daily battery life and percentage accuracy.
Signs Your Samsung S23 Ultra Battery Needs Recalibration
Five specific signs indicate the Samsung S23 Ultra battery management system needs recalibration rather than replacement. The device shuts down at 10-20% remaining charge consistently this indicates the management system’s low-capacity threshold is miscalibrated. The battery percentage jumps by 5-10% immediately after plugging in or unplugging the charger this indicates the stored capacity model is significantly out of sync with actual battery condition. The device shows 1% for an extended period (more than 30 minutes) before shutting down the model’s endpoint estimate is too conservative. The device charges from 0% to 100% in significantly less time than the rated charging speed suggests the reported 0% is not the true battery zero.
Estimated battery life in settings shows wildly different numbers day to day without corresponding changes in usage the management system’s usage model has degraded and needs a reset cycle.
Samsung S23 Fingerprint Calibration
To calibrate the Samsung S23 fingerprint sensor, go to Settings → Security and privacy → Biometrics → Fingerprints, delete all existing fingerprints, and re-enroll each fingerprint under good lighting with a clean, dry finger. Press firmly and vary the angle and position during enrollment to capture multiple touch zones. For persistent failures, use the calibration code #0# → Sensor to test sensor function.
The Samsung Galaxy S23 uses an under-display optical fingerprint sensor located in the lower third of the screen. This sensor works by illuminating the fingerprint area with the display panel itself specifically, it pulses specific pixels at high brightness to illuminate the finger, then captures the reflection pattern through a camera sensor beneath the display glass. This optical mechanism is significantly more sensitive to display condition than the older capacitive fingerprint sensors, which means screen protectors, display calibration settings, and even display cleanliness affect fingerprint recognition accuracy.
Fingerprint calibration on the S23 is primarily an enrollment quality issue rather than a hardware calibration issue. The sensor’s hardware is factory-calibrated at manufacturing and cannot be recalibrated by the user at the hardware level. What users can recalibrate is the stored biometric template the mathematical model of the fingerprint pattern stored in the Trusted Execution Environment by deleting and re-enrolling fingerprints with better enrollment technique.
How to Improve Fingerprint Sensor Accuracy
Improving fingerprint sensor accuracy on the Samsung S23 requires attention to three factors during enrollment: finger cleanliness, enrollment pressure, and angle variation. Before enrollment, wash and dry hands thoroughly oils, moisture, and debris on the finger surface are captured in the biometric template and reduce matching accuracy when the finger condition changes. During enrollment, press with firm, consistent pressure the same pressure you use when naturally unlocking the phone. Vary the angle slightly during enrollment, tilting the finger left, right, and slightly toward and away from yourself, to capture the full range of positions you naturally place your finger in during actual use.
The S23’s fingerprint enrollment flow asks you to lift and replace your finger multiple times specifically to capture different portions and angles of the fingerprint. Do not rush this process. Users who tap quickly through enrollment capture a limited template that only matches their fingerprint accurately in one specific position and pressure. Users who enroll carefully with varied positions and consistent pressure create templates that match reliably across normal use variation.
After enrollment, go to Settings → Security and privacy → Biometrics → Fingerprint recognition speed and select one of the available options. Higher recognition speed reduces the matching threshold which increases recognition speed but also increases false acceptance. For security-sensitive uses, keep it at standard speed. For users who prioritize convenience over security, the faster setting reduces frustration from recognition failures.
How to Reset and Recalibrate Fingerprint After Failed Scans
When the Samsung S23 fingerprint sensor has degraded to below 70% recognition accuracy with a clean, dry finger, the correct fix is complete re-enrollment. Go to Settings → Security and privacy → Biometrics → Fingerprints, authenticate to access fingerprint settings, then delete every enrolled fingerprint. After deletion, re-enroll each fingerprint following the careful enrollment technique described above.
If recognition accuracy remains poor after re-enrollment with careful technique, the issue may be display-related rather than template-related. The S23’s optical fingerprint sensor requires the display to be clean and unobstructed in the fingerprint zone. A screen protector that is not specifically certified as fingerprint-compatible for the S23 will block or scatter the optical illumination, dramatically reducing sensor performance. Remove the screen protector, re-enroll the fingerprint without it, and test accuracy. If accuracy improves significantly without the protector, the protector is the problem replace it with one specifically certified for S23 under-display fingerprint compatibility.
Samsung S23 Ultra Fingerprint Sensor Calibration
Samsung S23 Ultra fingerprint sensor calibration is performed by deleting all existing fingerprints in Settings → Security and privacy → Biometrics → Fingerprints and re-enrolling with firm pressure and varied angles. The S23 Ultra uses the same optical under-display fingerprint technology as the standard S23 but with a slightly larger sensor area. Use the code *#9090# to access service mode for advanced sensor diagnostics.
The Samsung S23 Ultra’s fingerprint sensor occupies a larger area under the display than the standard S23 model, providing a more generous target zone for finger placement. Despite this advantage, the S23 Ultra is more commonly reported as having fingerprint accuracy issues than the standard S23, largely because the S23 Ultra users are more likely to use thick screen protectors particularly the built-in screen protector and cases that cover the fingerprint zone that interfere with the optical sensor’s illumination and capture path.
Samsung ships the S23 Ultra with a pre-installed screen protector from the factory. This protector is certified compatible with the optical fingerprint sensor and should not affect accuracy when used with properly enrolled fingerprints. Third-party replacements, including many marketed specifically for the S23 Ultra, often do not maintain the same optical transparency in the near-infrared wavelengths used by the fingerprint sensor, reducing recognition performance.
Under-Display Fingerprint Sensor — How It Works
The S23 Ultra’s under-display optical fingerprint sensor operates through a three-component system. The AMOLED display panel pulses a bright white flash in the fingerprint zone when a touch is registered in that area. This flash illuminates the ridges and valleys of the fingerprint from below through the glass. A dedicated image sensor beneath the display captures the reflection pattern created by the difference in light reflection between fingerprint ridges (direct contact with glass, high reflection) and valleys (air gap, lower reflection). The captured image is processed by the secure element to extract a mathematical representation of the fingerprint pattern, which is compared against stored templates.
This optical mechanism is why display brightness settings affect fingerprint performance. At very low brightness settings, the sensor flash competes with reduced ambient light and may produce lower-contrast fingerprint images. At maximum brightness, the sensor performs optimally because the high-contrast illumination produces the clearest fingerprint image. Users experiencing poor fingerprint performance specifically in dark environments should try unlocking at slightly higher brightness to confirm whether display brightness is a factor.
Samsung S23 Ultra Fingerprint Calibration Code
The Samsung S23 Ultra fingerprint calibration code accessible through the service dialer is #0# which opens the hardware diagnostic menu. From this menu, select Sensor to access sensor function tests including touch sensitivity and proximity sensor tests. There is no user-accessible fingerprint-specific calibration code that modifies the sensor’s hardware calibration the hardware calibration is performed at the factory level and is not user-serviceable.
The code *#9090# accesses Samsung’s service mode diagnostic interface, which contains more detailed sensor status information. This menu is primarily for service technicians and displays raw sensor output values useful for diagnosing sensor hardware problems. For the vast majority of fingerprint accuracy issues, user-level re-enrollment is the appropriate fix and service mode diagnostics are unnecessary.
Samsung S23 Proximity Sensor Calibration
To recalibrate the Samsung S23 proximity sensor, dial #0# in the Phone app, select Sensor from the test menu, and run the proximity sensor test. Cover and uncover the sensor at the top of the phone to verify it registers correctly. If the sensor fails the test, go to Settings → Accessibility → Interaction and dexterity → Interaction control and toggle off, then on again to reset sensor parameters.
The proximity sensor in the Samsung S23 series is located at the top of the device, embedded in the punch-hole camera array area. This sensor uses infrared light to detect when an object specifically your ear or face is close to the display during a phone call, triggering the screen to turn off and disable accidental touch inputs. After a screen replacement, proximity sensor misalignment or miscalibration is one of the most common complaints the replacement screen or adhesive layer alters the infrared transmission path, causing the sensor to misread distances.
Proximity sensor calibration issues present in two characteristic ways. The screen stays on during calls (sensor reads “far” when it should read “near”), causing accidental button presses with the ear or cheek. Or the screen turns off and won’t come back on between calls (sensor reads “near” when nothing is blocking it), making the device temporarily unusable. Both issues can often be resolved through software reset procedures before requiring hardware service.
How to Recalibrate Proximity Sensor After Screen Replacement
After a Samsung S23 screen replacement, proximity sensor recalibration follows a specific sequence. First, ensure the replacement screen is properly seated with no gap between the screen assembly and the device body gaps allow light leakage that confuses the infrared sensor. Second, access Settings → Apps, tap the three-dot menu, select Show system apps, find Phone app, and clear its cache and data. Third, dial #0# and run the Sensor test, specifically testing proximity by covering and uncovering the sensor area. Fourth, if the sensor still reads incorrectly after a software test, access Settings → General management → Reset → Reset all settings this resets all system settings including sensor parameters without erasing data.
If the proximity sensor still fails to calibrate correctly after these steps following a screen replacement, the most likely cause is an incompatible screen assembly particularly a non-OEM panel whose proximity sensor cutout or protective covering doesn’t match Samsung’s specification. Professional Samsung service center calibration using factory software is required in this case.
Fixing Auto Screen Off Issues During Calls
When the Samsung S23 screen turns off and won’t come back on during calls because the proximity sensor is stuck in a “near” state, three fixes are available in order of complexity. First, clean the proximity sensor area at the top of the screen with a microfiber cloth oils and debris can partially obstruct the sensor aperture, causing false “near” readings. Second, remove any screen protector or case that covers the sensor area and test whether the problem resolves aftermarket accessories frequently obstruct proximity sensors without users realizing it. Third, go to Settings → Accessibility → Interaction and dexterity → Interaction control and toggle the setting off and on to force a sensor state reset.
Samsung S23 Gyroscope Calibration
To calibrate the Samsung S23 gyroscope, download the Google Play Services built-in calibration through any app that prompts sensor calibration (such as Google Maps), or use the manual figure-8 calibration motion: with the device held flat, draw a smooth figure-8 pattern in the air eight to ten times to reset the gyroscope’s orientation baseline. Access gyroscope diagnostics through #0# → Gyro sensor in the hardware test menu.
The gyroscope in the Samsung S23 series is a three-axis MEMS gyroscope that measures rotational velocity around the X, Y, and Z axes. Combined with the accelerometer and magnetometer, it forms the basis of the device’s orientation sensing powering screen rotation, gaming motion controls, AR applications, image stabilization calculations, and navigation heading. When the gyroscope drifts out of calibration, these applications behave incorrectly: AR objects drift from their anchors, game controls respond to motions that didn’t occur, or the compass heading gradually rotates without the device moving.
Gyroscope drift in the S23 is typically a soft calibration issue rather than a hardware failure. The MEMS gyroscope measures rotation by detecting the effect of the Coriolis force on a vibrating element temperature changes and extended disuse can shift the zero-rate offset (the sensor’s output when stationary), causing the accumulating rotation calculation to drift from reality. This is corrected by a calibration routine that establishes the sensor’s actual zero-rate baseline under current conditions.
How to Calibrate Gyroscope for Better Gaming Performance
Gyroscope calibration specifically for gaming on the Samsung S23 involves both the hardware calibration and the game-specific sensitivity settings. For hardware calibration, perform the figure-8 motion with the device powered on and the screen active hold the phone in landscape orientation (as you would while gaming) and draw ten smooth, continuous figure-8 patterns through the air. This motion exercises all three gyroscope axes and prompts Android’s sensor fusion algorithm to update its zero-rate offset estimate.
After hardware calibration, individual game titles have their own gyroscope sensitivity and calibration settings. In PUBG Mobile and Battlegrounds, access Settings → Sensitivity → Gyroscope and adjust the sensitivity values for each scope magnification. Higher values increase the amount of aim movement per degree of device rotation. For general calibration rather than sensitivity tuning, use the in-game gyroscope calibration option available in most FPS titles this sets the device’s current position as the neutral aim reference point. Perform this calibration with the device held in your natural gaming position, not lying flat on a table.
Fixing Inaccurate Motion Sensor Readings
Inaccurate motion sensor readings on the Samsung S23 including erratic screen rotation, incorrect gaming orientation response, and navigation heading errors are addressed through Samsung’s built-in sensor calibration in the Compass application. Open the Compass app (preinstalled on Samsung devices), follow its figure-8 calibration motion prompts, and allow it to complete the magnetometer and gyroscope calibration sequence.
For persistent accelerometer issues specifically affecting screen rotation, go to Settings → Display → ensure Auto rotate is enabled, then go to Settings → General management → Reset → Reset all settings to restore sensor parameters to factory defaults. This reset affects all sensor calibration simultaneously and resolves the majority of software-level motion sensing inaccuracies without requiring a full factory reset.
Samsung S23 Compass Calibration
To calibrate the Samsung S23 compass, open the Compass app or Google Maps and follow the figure-8 calibration prompt: hold the device loosely and rotate it in a smooth figure-8 pattern several times in all orientations. Move away from metal objects, speakers, and electronics during calibration, as magnetic interference invalidates compass calibration immediately.
The compass in the Samsung S23 series uses a magnetometer a sensor that measures magnetic field strength and direction to determine geographic orientation. This is the sensor that powers map navigation heading, augmented reality compass overlays, and any application that needs to know which direction the device is pointed. Magnetometer calibration is uniquely sensitive to the environment because it measures ambient magnetic fields, and any nearby magnetic source a car speaker, a metal desk, a magnetic phone case, a laptop, even certain building materials will shift the calibration baseline.
This environmental sensitivity means that compass calibration is not a one-time fix. The S23’s magnetometer can become miscalibrated simply by leaving the device near a magnetic source while it’s idle. If you notice your navigation heading drifting or your compass showing incorrect directions, the most likely cause is environmental magnetic interference during the last calibration event, not a hardware failure.
How to Calibrate Compass for Accurate Navigation
Compass calibration for navigation accuracy on the Samsung S23 requires attention to the environment as much as the procedure. Move to an open area away from electronics, vehicles, metal furniture, and buildings with structural steel before calibrating. Hold the device at waist height. Open Samsung’s Compass app and perform the figure-8 motion as prompted rotate the device through all axes including rolling it left and right, tilting nose up and down, and turning it face-up and face-down during the figure-8 pattern. This exercises the magnetometer across all three measurement axes and establishes accurate field reference values in each direction.
After calibration, verify accuracy by standing facing a known direction if you can see the sun in the morning, you know east is toward it and confirming the compass heading matches. If the calibrated compass still shows incorrect headings in open air away from interference sources, the magnetometer may have been affected by a magnetic impact (dropping near a magnetic surface) that has shifted the sensor’s hard-iron calibration. In this case, Google’s Android sensor fusion will gradually correct for the hard-iron offset over minutes of use as the device accumulates magnetic field samples from multiple orientations.
Why Your Samsung S23 Compass Loses Accuracy
Compass accuracy on the Samsung S23 degrades for three reasons. Magnetic interference from nearby sources speakers, charging pads, metal objects, other electronics shifts the measured field reference and produces incorrect headings. Physical shock from dropping the device can shift the magnetometer’s hard-iron offset, a permanent magnetic bias that requires extended recalibration to correct. Software updates that modify sensor fusion parameters occasionally reset the magnetometer’s stored calibration values, requiring a new figure-8 calibration before navigation accuracy is restored.
Magnetic cases are a particularly underappreciated source of compass inaccuracy. Many wallet cases and car mount cases use magnets in their construction, and these magnets are in constant proximity to the S23’s magnetometer, continuously biasing its readings. If you use a magnetic case and experience persistent compass inaccuracy, test the compass with the case removed if accuracy improves, the case is the source of the calibration problem.
Samsung S23 Ambient Light Sensor Calibration
The Samsung S23 ambient light sensor cannot be manually calibrated by the user it is factory-calibrated hardware. To restore accurate auto-brightness behavior, go to Settings → Display → Adaptive brightness, toggle it off, use manual brightness for several days to establish usage baselines, then re-enable Adaptive brightness to allow it to relearn your preferences from scratch.
The ambient light sensor in the Samsung S23 is located alongside the proximity sensor at the top of the device. It measures the intensity and color temperature of ambient light to drive two functions: automatic brightness adjustment (raising display brightness in bright environments and lowering it in dim environments) and adaptive color tone adjustment (warming or cooling the display to match ambient light color temperature). Both functions depend on accurate ambient light measurement.
The most common ambient light sensor problem reported on the Samsung S23 is not hardware miscalibration but rather Adaptive brightness that has learned incorrect preferences. Samsung’s Adaptive brightness system uses a machine learning algorithm that observes how you manually adjust brightness in different lighting conditions and builds a model of your preferences. Over time, this model can drift particularly if you frequently adjusted brightness during screen glitches, software issues, or other atypical usage events that taught the algorithm incorrect associations between light levels and your preferred brightness.
How to Recalibrate Ambient Light Sensor for Auto-Brightness
Recalibrating the Adaptive brightness system on the Samsung S23 involves resetting its learned model and allowing it to build a new one from scratch. Go to Settings → Apps → Show system apps → Device Health Services → Storage → Clear storage. This clears the learned brightness model stored by the system service that manages Adaptive brightness. After clearing, re-enable Adaptive brightness if it was disabled, and use the device normally for three to five days, manually adjusting brightness whenever auto-brightness doesn’t match your preference. The system will rebuild its model from these new adjustments and should converge on accurate behavior more quickly than the original learning period.
Fixing Uneven Screen Brightness on Samsung S23
Uneven screen brightness where one area of the display appears brighter or dimmer than adjacent areas is a hardware characteristic of OLED panels called DSE (Display Spot Effect) or panel non-uniformity. This is not an addressable calibration issue in the traditional sense. Samsung’s display calibration affects the overall color and brightness output of the panel uniformly it cannot correct localized brightness variation because that requires pixel-level adjustment beyond One UI’s capability.
For minor brightness non-uniformity that has appeared gradually over extended use, some users report improvement from running a screen burn-in treatment displaying white, gray, and color gradient images at moderate brightness for extended periods to even out differential aging in the OLED pixel material. Samsung’s built-in AMOLED screen saver feature serves a similar purpose for mild cases. Severe brightness non-uniformity is a hardware defect covered under Samsung’s warranty.
Samsung S23 Ultra S Pen Calibration
To calibrate the Samsung S23 Ultra S Pen, go to Settings → Advanced features → S Pen → More S Pen settings → Pointer and tap Calibrate. Follow the on-screen targets by tapping each crosshair precisely with the S Pen tip. Complete all calibration points without interruption for accurate touch-to-display alignment calibration.
The Samsung S23 Ultra’s S Pen uses electromagnetic resonance (EMR) technology rather than the capacitive touchscreen technology used for finger input. EMR works by generating an electromagnetic field from the digitizer layer beneath the display, which the S Pen’s resonant coil responds to by modifying field characteristics that the digitizer detects as position and pressure data. This entirely separate input layer is why the S Pen can be used while wearing gloves, works without a battery in the pen itself (the S24 Ultra introduced a battery-free S Pen), and provides pressure sensitivity data unavailable to finger touches.
S Pen calibration addresses the alignment between the physical tip of the pen and the point on screen that the EMR digitizer reports as the pen’s position. When this alignment is off visible as the cursor appearing slightly offset from where the pen tip touches the glass line work in drawing apps appears displaced, handwriting recognition has reduced accuracy, and precise screen interactions become frustrating. Calibration corrects this offset by establishing accurate position mapping across the full display surface.
How to Calibrate S Pen for Accurate Touch Response
S Pen calibration on the Samsung S23 Ultra is accessed through Settings → Advanced features → S Pen → More S Pen settings → Pointer. The Calibrate option opens a calibration interface that presents target crosshairs at multiple positions across the display. Tap the center of each crosshair precisely with the S Pen tip, maintaining the same angle you typically use when writing or drawing. The calibration system records the offset between each reported position and target position and writes correction values to the digitizer driver.
For accurate calibration results, hold the S Pen at your natural writing angle during calibration rather than perfectly perpendicular. EMR digitizers exhibit parallax effects the reported position shifts slightly based on pen angle because the electromagnetic field sampling point is slightly below the surface where the tip contacts the glass. Calibrating at your natural angle incorporates your typical angle’s parallax offset into the correction, producing more accurate alignment during actual use than calibrating perpendicular would.
S Pen Sensitivity and Pressure Settings
S Pen pressure sensitivity on the Samsung S23 Ultra is not directly calibrated through a user-accessible settings panel it is configured per-application, with each drawing and note-taking app implementing its own pressure curve interpretation. Samsung Notes and the built-in note applications use Samsung’s pressure sensitivity implementation directly, while third-party applications like Clip Studio Paint, Procreate for Galaxy, and Concepts implement their own pressure curves that can be adjusted within each application’s settings.
If the S Pen tip feels less responsive than it should or requires excessive pressure to register strokes, the pen tip may be worn. Samsung includes replacement tips with the S23 Ultra and sells additional replacement kits. A worn tip increases the physical distance between the pen coil and the glass surface, reducing signal strength and pressure sensitivity. Replacing the tip with a fresh one often restores pressure sensitivity without any software calibration.
Samsung S23 Ultra Touch Screen Calibration Settings
Samsung S23 Ultra touchscreen calibration settings are accessed through Settings → Display → Touch sensitivity for screen protector compensation, and through the hidden diagnostic menu by dialing #0# for hardware-level touch zone testing. One UI 5 and later removed the dedicated touchscreen calibration menu that was present in older Samsung software versions.
The Samsung S23 Ultra’s touchscreen uses a 240Hz touch sampling rate twice the 120Hz display refresh rate to capture touch input with sub-millisecond precision. This high sampling rate is what makes the S23 Ultra’s touch response feel immediate and accurate, and it is why touch calibration issues on the S23 Ultra are particularly noticeable when they occur. Any offset or dead zone in the 240Hz touch layer is apparent immediately because the device’s responsiveness sets a high expectation that the calibration problem visibly fails to meet.
Touch calibration on the S23 Ultra, like the standard S23, is primarily a software sensitivity and zone mapping issue rather than a hardware calibration issue for most users. The digitizer hardware is factory-calibrated to a high precision standard at manufacturing, and this hardware calibration degrades only from physical damage or screen replacement with non-OEM components. Software-level calibration sensitivity adjustment, touch zone remapping is accessible through the methods described in this section.
Hidden Diagnostic Menu for Sensor Testing
The Samsung S23 Ultra’s hidden diagnostic menu is one of the most useful tools for verifying sensor function and performing software-level calibration tests. Access it by opening the Phone app and dialing #0#. This code does not make a call it opens a hardware test interface showing buttons for Screen, Red/Green/Blue pixel tests, Receiver, Vibration, Camera, Accelerometer, Proximity sensor, Touch, Sleep/wake, Fingerprint, Barcode, and Back/Home/Volume button tests.
For touch calibration specifically, tap Touch to open the touch zone test grid. Drag your finger across every section of the displayed grid. Each section should light up as your finger passes over it. Any section that fails to respond indicates either a dead zone in the digitizer (requiring hardware service) or a software miscommunication that can potentially be resolved by clearing the display system’s cache.
How to Access Samsung S23 Sensor Calibration Menu
The Samsung S23 series sensor calibration menu is distributed across several access points rather than consolidated in one location. The primary diagnostic access codes are: #0# for the hardware test menu (touchscreen, sensors, display color tests), *#0228# for battery information, *#9090# for service mode diagnostics, and *#7353# for an alternative hardware test menu on some carrier variants. These codes are entered in the Phone dialer app not in a browser or search bar.
For software-level sensor settings rather than diagnostics, the relevant paths are: Settings → Display for touchscreen and display calibration, Settings → Advanced features → Motion and gestures for motion sensor behavior, Settings → Advanced features → S Pen for S Pen calibration, and Settings → Biometrics → Fingerprints for fingerprint sensor management. Samsung’s dedicated calibration tools are distributed across these menu paths rather than consolidated in a single calibration interface.
Accelerometer Calibration on Samsung S23
The Samsung S23 accelerometer cannot be directly calibrated by users through standard One UI settings. To correct accelerometer-related issues like erratic screen rotation, go to Settings → Display → ensure Auto rotate is enabled, then perform a Settings reset via Settings → General management → Reset → Reset all settings to restore factory sensor parameters.
The accelerometer in the Samsung S23 measures linear acceleration across three axes the force acting on the device along X (left-right), Y (up-down), and Z (front-back) directions. It powers screen rotation (determining which way is down), step counting, fall detection, and gaming tilt controls. Combined with the gyroscope in Android’s sensor fusion algorithm, it provides the complete six-degrees-of-freedom motion data that AR applications, navigation, and gaming use for device orientation tracking.
Accelerometer miscalibration presents as incorrect screen rotation (the screen rotates when the device hasn’t moved, or fails to rotate when tilted), inaccurate step counting, or erratic tilt-based gaming controls. True hardware miscalibration of the accelerometer is uncommon in the S23 series Samsung’s MEMS accelerometers are stable components that rarely drift from factory calibration under normal use conditions. Most reported accelerometer issues are actually software-level orientation sensor fusion errors, addressable through settings reset procedures.
Fixing Screen Rotation Problems
Screen rotation problems on the Samsung S23 that persist after confirming Auto rotate is enabled in Settings → Display are caused by three possible issues. First, recent apps or background processes interfering with the orientation sensor restart the device to clear running processes. Second, specific apps that lock orientation regardless of system settings check if the problem occurs in all apps or only specific ones. Third, accumulated sensor fusion errors from extended uptime a device restart resets the sensor fusion algorithm’s state and resolves accumulated drift.
For persistent screen rotation problems that return after restarting, perform Settings → General management → Reset → Reset all settings. This resets every system setting to factory default including sensor fusion parameters, without erasing apps or data. The vast majority of persistent screen rotation issues resolve with this reset.
Impact of Accelerometer Calibration on Gaming
Gaming performance on the Samsung S23 that relies on accelerometer-based tilt controls is affected by both hardware calibration accuracy and the game’s internal calibration settings. For hardware accuracy, perform the figure-8 motion calibration through a compass app to reset the sensor fusion baseline. For game-specific calibration, most competitive mobile games include an in-game tilt calibration that sets the device’s current position as the neutral reference perform this calibration while holding the device in your natural gaming grip to establish the most accurate neutral reference for your playing style.
Best Apps for Samsung S23 Calibration
The best apps for Samsung S23 calibration are Samsung’s built-in diagnostic menu (#0#), CPU-Z for sensor status verification, Sensor Kinetics Pro for detailed sensor output monitoring, and Google’s Pixel calibration tools embedded in Play Services. For display calibration, Samsung’s own Screen mode settings outperform any third-party app for the S23’s hardware.
The Samsung Galaxy S23 series is calibrated at both the hardware firmware level and through Samsung’s One UI software layer. Third-party calibration apps operate at the Android application layer, which sits above Samsung’s hardware calibration layer they cannot access or modify the fundamental sensor calibration values stored in firmware. This means that most third-party calibration apps on the Play Store are, at best, providing sensor monitoring and visualization rather than true hardware calibration. At worst, some apps marketed as “phone calibrators” are effectively placebo applications that display animated calibration-looking sequences without modifying any system parameters.
The legitimate use cases for third-party apps in S23 calibration are sensor monitoring (verifying that sensors are returning accurate values), display test patterns (providing reference images for visual white balance calibration), and gaming-specific gyroscope offset adjustment (setting an application-level calibration reference without modifying system sensor values).
Built-in Samsung Tools vs Third-Party Apps
Samsung’s built-in tools consistently outperform third-party alternatives for the S23 series because they have direct access to Samsung’s hardware abstraction layer. The #0# diagnostic menu, Samsung Members’ device diagnostics, and the Settings-based calibration options in Display, Biometrics, and Advanced features interact with Samsung’s proprietary sensor stack in ways that Play Store applications cannot. For display calibration specifically, Samsung’s Screen mode and Advanced settings modify the display’s color rendering at the driver level third-party display apps work by overlaying color filters on top of the display output, which reduces brightness and cannot address the underlying panel calibration.
The practical recommendation is to exhaust Samsung’s built-in tools before considering third-party applications. Built-in tools are free, don’t require permissions, interact with hardware correctly, and don’t introduce new variables into the calibration process.
Are Third-Party Calibration Apps Reliable for Samsung S23
Third-party calibration apps are reliable for specific, limited use cases and unreliable for others. Sensor monitoring apps like CPU-Z and Sensor Kinetics Pro reliably report raw sensor output values useful for verifying that sensors are functioning and for identifying drift. Display test pattern apps like DisplayTester provide reliable reference patterns for visual white balance calibration. These apps are doing what they claim.
Apps that claim to “calibrate” the battery, “optimize” sensor performance, or “improve” device speed through calibration routines are not performing genuine hardware calibration. They are manipulating application-layer settings or simply animating progress bars without modifying underlying parameters. For genuine Samsung S23 calibration, Samsung’s own diagnostic and settings tools are the only reliable path.
FAQs
How do I calibrate a Samsung screen?
To calibrate a Samsung Galaxy S23 screen, go to Settings → Display → Screen mode, select Natural for color accuracy, then tap Advanced settings and adjust the White balance slider until neutral tones appear genuinely neutral. For fine-tuning, expand the RGB sliders and adjust each channel individually until the display matches your reference standard.
What is the Samsung S23 touch screen calibration code?
The Samsung S23 touchscreen diagnostic code is #0# entered in the Phone dialer app. This opens the hardware test menu where you select Touch to run a full-screen touch zone test. There is no code that directly recalibrates the touch digitizer the #0# menu tests touch function and identifies problem zones rather than recalibrating hardware values.
Can I calibrate the Samsung S23 battery myself?
Yes. Drain the battery completely until the device powers off, then charge it uninterrupted to 100% using the original Samsung charger. Repeat this cycle two to three times to reset the battery management system’s capacity model and restore accurate percentage reporting.
How do I access the Samsung S23 hidden calibration menu?
Dial #0# in the Samsung Phone app to access the hardware diagnostic menu. This menu includes tests for touch, display colors, sensors, camera, vibration, and buttons. Additional diagnostic codes include *#0228# for battery information and *#9090# for service mode diagnostics.
Why does my Samsung S23 fingerprint sensor keep failing?
The most common cause of Samsung S23 fingerprint sensor failures is poor enrollment quality combined with an incompatible screen protector. Delete all fingerprints and re-enroll with a clean, dry finger using firm pressure and varied angles. If using a screen protector, confirm it is specifically certified for S23 optical fingerprint sensor compatibility.
How do I calibrate the Samsung S23 Ultra S Pen?
Go to Settings → Advanced features → S Pen → More S Pen settings → Pointer → Calibrate. Tap each crosshair target precisely with the S Pen tip at your natural writing angle to calibrate position mapping across the full display surface.
How do I fix Samsung S23 color accuracy after a software update?
After a software update shifts display color accuracy, go to Settings → Display → Screen mode → Natural mode → Advanced settings. Reset white balance to Neutral using the slider, then make fine adjustments using individual RGB channel sliders until neutral tones appear genuinely neutral.
Can I calibrate the gyroscope on Samsung S23 for better gaming?
Perform the figure-8 calibration motion by holding the device at your natural gaming orientation and rotating it through ten smooth figure-8 patterns in the air. This resets the gyroscope’s zero-rate offset baseline. Follow up with in-game gyroscope calibration in each game title to set the application-level neutral reference point.
How do I fix Samsung S23 proximity sensor after screen replacement?
After a screen replacement, clear the Phone app’s cache and data through Settings → Apps, then test the proximity sensor via #0# → Sensor. If the sensor still misfires, go to Settings → General management → Reset → Reset all settings to restore factory sensor parameters without erasing data.
Does Samsung S23 have a dedicated calibration app?
Samsung does not offer a dedicated standalone calibration app. Calibration functions are distributed across the Settings app (Display, Biometrics, Advanced features), the built-in Compass app (magnetometer calibration), the #0# diagnostic menu (hardware tests), and Samsung Members (device diagnostics including battery health assessment).
How do I calibrate the Samsung S23 compass for navigation?
Open the Compass app or Google Maps and perform the figure-8 calibration motion rotate the device through all axes including rolling and tilting in an open area away from electronics, metal objects, and magnetic sources. Verify calibration accuracy by confirming the heading matches a known direction before relying on it for navigation.
Can screen calibration improve outdoor visibility on Samsung S23?
Enabling maximum brightness, Adaptive brightness, and Vivid display mode together produces the best outdoor visibility on the Samsung S23. The S23 Ultra’s Vision booster feature provides additional outdoor visibility optimization specifically for direct sunlight conditions, accessible through Settings → Display → Vision booster.
How do I recalibrate the Samsung S23 ambient light sensor?
The ambient light sensor hardware cannot be user-calibrated. To reset the Adaptive brightness learning model that drives auto-brightness behavior, go to Settings → Apps → Show system apps → Device Health Services → Storage → Clear storage. This forces the system to rebuild its brightness model from scratch based on fresh usage data.
What causes Samsung S23 touch screen calibration issues?
The four main causes of Samsung S23 touchscreen calibration issues are screen protectors that alter capacitive field transmission (fix: enable Touch sensitivity mode), non-OEM replacement screens with incompatible digitizer offset values (fix: OEM replacement or professional recalibration), software conflicts affecting touch parameter interpretation (fix: device restart or settings reset), and physical digitizer damage (fix: hardware service).
How do I know if my Samsung S23 needs professional calibration?
Your Samsung S23 needs professional calibration when hardware-level sensor problems persist after exhausting all software-level fixes including re-enrollment, settings resets, and diagnostic menu tests. Specific indicators requiring professional service include a proximity sensor that consistently misreads after a settings reset following screen replacement, touchscreen dead zones confirmed through the #0# touch test, and under-display fingerprint sensor failures that persist after re-enrollment and screen protector removal.
Conclusion
After working through every calibration scenario the Samsung Galaxy S23 series presents from the display panel to the S Pen digitizer, from the optical fingerprint sensor to the magnetometer the consistent theme that emerges is that most S23 calibration problems are software-layer issues, not hardware failures, and most of them are addressable through Samsung’s built-in tools without visiting a service center.
The display calibration options buried in Screen mode’s Advanced settings are genuinely powerful and more capable than most users realize. The hidden diagnostic menu accessible through #0# is a professional-grade tool sitting behind a simple dialer code, available to every S23 owner who knows about it. The battery recalibration cycle is a genuinely effective procedure for restoring accurate percentage reporting. The fingerprint sensor enrollment quality makes more difference to recognition accuracy than any setting or code. These are not workarounds they are the intended calibration mechanisms Samsung built into One UI.
Where I want to be direct with you is about limitations. Hardware-level sensor calibration the values written into firmware at the factory is not user-serviceable. No app on the Play Store modifies these values. No dialer code rewrites the fundamental accuracy baseline of your accelerometer or gyroscope hardware. What software calibration does is build correction layers and learned models on top of the hardware baseline. When the hardware baseline shifts due to physical damage, non-OEM screen replacement, or hardware failure, software calibration reaches its limit and professional service becomes the correct answer.
The approach that produces the best results is methodical: identify the specific symptom, work through the relevant software calibration steps in the order described in this guide, verify the result, and only escalate to professional service when software methods are genuinely exhausted. Most Samsung S23 calibration issues resolve within that process. The ones that don’t resolve have already told you what you need a service center with Samsung factory calibration software and the hardware to back it up.
Also Read: