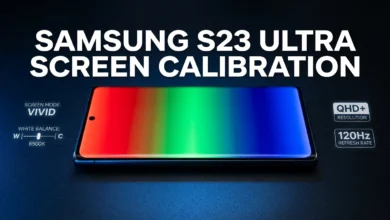
Samsung Galaxy S23 Screen Calibration After Update or Repair Gone Wrong
Samsung Galaxy S23 Screen Calibration After Update or Repair Complete Fix Guide

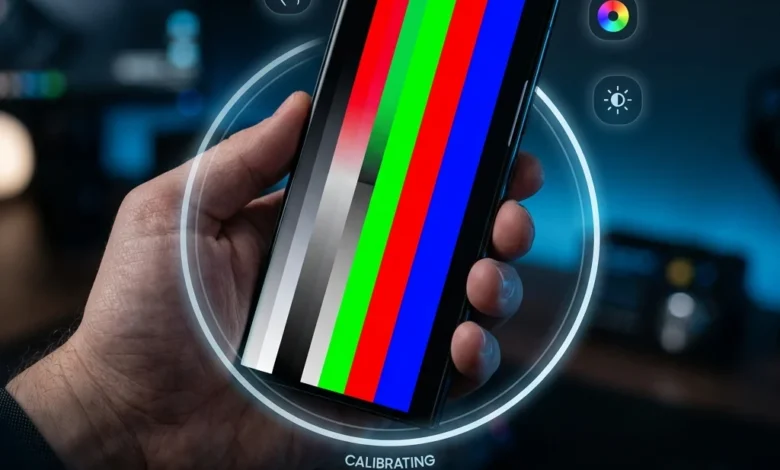
I’ve lost count of how many times someone has told me their Samsung Galaxy S23 screen “just stopped feeling right” right after a software update or a screen repair. The colors look slightly off. The touch response feels half a second behind. Taps register in the wrong spot. None of this means your phone is broken it almost always means your display needs to be recalibrated to match its new software state or its new hardware reality. This guide is the deep-dive on exactly that problem. If you want the complete picture of every sensor on the S23 battery, fingerprint, compass, gyroscope, and more
Our complete Samsung S23 calibration guide covers the full device. This article goes deep on one specific, common scenario: screen calibration after an update or repair.
How Do I Calibrate My Samsung Phone Screen After an Update or Repair
To calibrate your Samsung phone screen after an update or repair, go to Settings → Display → Screen mode, select Natural for accuracy, adjust White balance under Advanced settings, then go to Settings → Display → Touch sensitivity and toggle it based on whether you’re using a screen protector. If touch response still feels off, clear the system cache through Recovery mode.
Software updates and screen repairs disturb your Samsung Galaxy S23’s display calibration in completely different ways, which is why the fix depends on which one caused your problem. A software update can reset display parameters, modify the rendering pipeline, or change default screen mode settings without you asking for any of that. A screen repair especially with a non-OEM replacement panel introduces a physical digitizer with different sensitivity characteristics than the one your phone shipped with, and Samsung’s stored calibration values may not match the new hardware.
The good news is that most calibration problems from either cause are fixable through software, without needing to send your phone anywhere. The bad news is that people often apply the wrong fix they try a software reset for a hardware problem, or vice versa and waste time chasing a solution that was never going to work for their specific situation.
What Changes in Display Settings After a Software Update
Samsung pushes display-related changes through software updates more often than most users realize. A One UI update can silently reset your Screen mode back to Vivid even if you had it set to Natural. It can modify the white balance baseline, shifting your previously-calibrated color temperature. It can also change how Touch sensitivity interacts with screen protectors, sometimes requiring you to re-enable a setting that update overwrote.
The practical fix here is straightforward: after any major software update, go through your Display settings methodically. Check Screen mode first confirm it’s still set to your preferred mode. Check Advanced settings confirm white balance hasn’t reset to default. Check Touch sensitivity confirm it’s still toggled the way you had it if you use a screen protector. This five-minute check after every update saves you from days of “something feels off” frustration.
What Changes in Display Hardware After a Screen Repair
A screen repair changes your physical hardware, and that’s a fundamentally different kind of disruption than a software update. The new screen assembly has its own digitizer the layer that detects touch and its own panel characteristics for color and brightness. Even with a genuine Samsung OEM replacement part, the calibration data stored in your phone’s firmware was originally written for the factory-installed screen, not the replacement.
This is why touch sensitivity and color accuracy issues are so common immediately after a repair. Your phone’s software is still operating on calibration assumptions from the old screen. The fix involves both software recalibration (adjusting settings to match the new hardware’s actual behavior) and, in some cases, using Samsung’s official repair calibration tools to write new baseline values specific to the replacement part.
Can I Recalibrate My Samsung Galaxy S23 Screen Myself
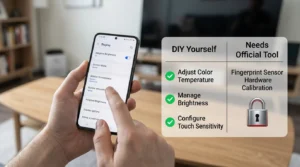
Yes, you can recalibrate most aspects of your Samsung Galaxy S23 screen yourself through built-in settings screen mode, white balance, touch sensitivity, and brightness are all user-adjustable. What you cannot do yourself is rewrite the underlying hardware calibration data after a screen replacement that requires Samsung’s official calibration software, available through authorized repair channels or Samsung Self Repair Assistant for supported repairs.
There’s a clear line between calibration tasks you can handle independently and ones that require official tools. Software-layer calibration anything accessible through the Settings app is entirely within your control and doesn’t risk damaging anything. Hardware-layer calibration writing new digitizer baseline values after a physical screen swap is where DIY approaches hit a wall, because the tools to do this properly aren’t exposed to regular users outside Samsung’s official repair ecosystem.
What You Can Fix Through Software Settings
Everything related to how your screen displays color, how bright it gets, and how sensitive it is to touch within normal operating parameters can be adjusted through Settings → Display. This includes Screen mode (Vivid, Natural, Photo, Video), white balance and RGB sliders, brightness and adaptive brightness behavior, touch sensitivity for screen protector compatibility, and resolution settings. None of these require any technical expertise beyond following the menu paths they’re designed for everyday users to adjust.
What Requires Samsung Self Repair Assistant or a Technician
After a genuine screen replacement, particularly one not performed at an authorized Samsung service center, you may need Samsung’s Self Repair Assistant app to properly recalibrate hardware-level sensor data tied to the new screen specifically the under-display fingerprint sensor and certain display calibration profiles. This app, available for self-repair customers who purchase genuine Samsung parts, walks through a guided calibration process that writes correct baseline data for the new component. Repairs done through third-party shops without access to this tool may leave your phone functional but not fully calibrated at the hardware level which is the root cause of persistent touch or color issues that software settings alone can’t resolve.
How Do I Fix My Inaccurate Touch Screen on Samsung S23
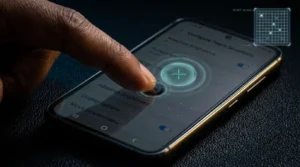
To fix an inaccurate touch screen on the Samsung S23, first clean the screen surface to rule out contamination, then go to Settings → Display → Touch sensitivity and toggle it on if you use a screen protector. If inaccuracy persists, restart the device to clear temporary software conflicts. If the screen was recently repaired, the digitizer calibration may need professional recalibration through Samsung’s official tools.
Touch inaccuracy presents in a few distinct ways, and identifying which one you’re experiencing points directly to the fix. If taps register slightly offset from where you actually touch, that’s a digitizer mapping issue, most common after a non-OEM screen replacement. If taps are ignored entirely in certain areas, that’s either a dead zone (hardware) or a software conflict blocking input in that region. If the screen responds inconsistently sometimes registering, sometimes not that’s frequently a screen protector compatibility problem rather than a calibration issue at all.
Touch Sensitivity Settings After Update
After a software update, touch sensitivity problems are almost always a settings reset rather than a hardware issue. Go to Settings → Display → Touch sensitivity and check whether it’s enabled. Updates sometimes reset this toggle to off, which causes screen protectors to interfere with touch registration in ways that feel exactly like a hardware fault but are actually a one-tap fix.
Touch Sensitivity Settings After Screen Repair
After a screen repair, touch sensitivity issues require a different diagnostic approach. First test the touch screen without any screen protector attached this immediately tells you whether the protector or the repair itself is the source of the problem. If touch accuracy is fine without a protector but poor with one, the replacement digitizer may have different sensitivity characteristics that need the Touch sensitivity toggle adjusted, or the protector itself may be incompatible with the new screen’s capacitive properties.
How to Reset Samsung S23 Screen After Software Update
To reset your Samsung S23 screen after a software update, go to Settings → General management → Reset → Reset all settings. This restores all display, sound, and system settings to factory defaults without erasing your apps, photos, or personal data. For display-specific issues only, you can instead reset just the Screen mode and white balance through Settings → Display.
A full settings reset is the broadest fix available without losing data, and it resolves the majority of post-update display oddities because it eliminates every possible misconfigured setting in one action rather than requiring you to hunt down which specific setting the update disturbed. It’s also completely safe Samsung’s “Reset all settings” option, distinct from “Factory data reset,” touches only configuration, not your content.
Resetting Display Settings to Default
For a more targeted approach that doesn’t reset unrelated settings like Wi-Fi passwords or sound profiles, go directly to Settings → Display → Screen mode and tap Natural, then go into Advanced settings and tap Reset on the white balance slider. This isolates the reset to just the display configuration, which is usually sufficient if you’ve confirmed the problem is specifically color or screen mode related rather than touch or system-wide.
Clearing System Cache to Fix Display Glitches
Beyond settings resets, clearing the system cache addresses a different category of post-update display glitches ones caused by corrupted temporary files rather than misconfigured settings. Power off your Samsung S23 completely. Press and hold Volume Up and the Power button simultaneously until you see the Samsung logo, then release. This boots into Recovery mode. Use the volume buttons to navigate to “Wipe cache partition” and the Power button to select it. Once complete, select “Reboot system now.” This process clears corrupted cache files that can cause rendering glitches, color flickering, or touch lag without affecting any of your personal data.
How Do I Get My Samsung Screen Back to Normal
To get your Samsung screen back to normal, restore Screen mode to Natural or your preferred default under Settings → Display, reset brightness to automatic/adaptive mode, and clear any custom color adjustments under Advanced settings. If the screen still doesn’t look or feel normal after these resets, restart the device to apply changes fully.
“Back to normal” usually means returning to a state the user remembers and trusts, which for most people means restoring factory defaults rather than fine-tuning anything new. The fastest way to achieve this is working backward through the same display settings that could have been changed by you, by an update, or by an app and resetting each to its default state.
Restoring Screen Mode to Factory Default
Samsung’s factory default screen mode is Vivid on most Galaxy S23 units, though some carrier variants ship with Natural. If you’re trying to get back to exactly how your phone looked out of the box, check both try Vivid first since it’s the more common factory default, and switch to Natural if that doesn’t match your memory of the original look.
Restoring Brightness and Contrast to Default
Brightness and contrast settings can drift from default through Adaptive brightness learning incorrect patterns over time, or through accidental adjustments. To restore default brightness behavior, go to Settings → Display → Brightness and drag the slider to the midpoint, then ensure Adaptive brightness is toggled on so the system rebuilds its learning model from a clean baseline going forward.
How to Restart Samsung Galaxy S23 When Screen Is Frozen
To restart a Samsung Galaxy S23 with a frozen screen, press and hold the Power button and Volume Down button simultaneously for 7 to 10 seconds until the screen turns off and the device restarts. This force restart doesn’t erase any data and works even when the touchscreen is completely unresponsive.
A frozen screen on the S23 is almost always a software lockup rather than a calibration problem, but it’s worth covering here because frozen screens frequently get misdiagnosed as calibration issues when actually the device just needs a forced restart to clear whatever process caused the freeze.
Force Restart Method for Frozen Screen
The force restart combination, Power and Volume Down held together for 7-10 seconds works independently of the touchscreen entirely, which is exactly why it’s effective when the screen won’t respond to taps. You’ll feel the device vibrate and see the screen go black before the Samsung logo appears, indicating the restart succeeded. This method has been consistent across the Galaxy S23 series and doesn’t require any specific software state to work.
When a Frozen Screen Signals a Repair-Related Problem
If your screen freezes repeatedly and specifically started after a screen repair, this pattern suggests something more significant than a normal software hiccup, it may indicate a loose ribbon cable connection, inadequate adhesive seating, or a digitizer that’s intermittently losing connection with the motherboard. A single freeze that resolves with restart is normal software behavior. Freezes that recur multiple times per day starting immediately after a repair warrant a follow-up with whoever performed the repair.
How Do I Reset the Screen on My Samsung Phone
To reset the screen on your Samsung phone without affecting other settings, go to Settings → Display, and individually reset Screen mode to Natural, Brightness to automatic, and Touch sensitivity to its default state for your device. This targeted approach resets only display-related configuration rather than every system setting.
There’s an important distinction between resetting “the screen” specifically and resetting your phone broadly. Many guides jump straight to factory reset or full settings reset, which is overkill for a display-specific problem and creates unnecessary disruption to settings you didn’t need to change.
Soft Reset vs Settings Reset — What’s the Difference
A soft reset (simply restarting the device) clears temporary memory and running processes but doesn’t change any saved settings it’s the gentlest intervention and should always be tried first. A settings reset (Settings → General management → Reset → Reset all settings) reverts saved configuration to factory defaults but preserves your apps and files this is the appropriate next step if a soft reset doesn’t resolve a display issue. A factory data reset erases everything and should be considered a last resort, almost never necessary for screen calibration problems specifically.
Step-by-Step Display Reset Process
Start with a soft reset by holding the Power button and selecting Restart. If the display issue persists, move to individually resetting Screen mode, white balance, and touch sensitivity through Settings → Display as described earlier in this guide. Only if these targeted resets fail should you consider the broader Settings reset, and factory data reset should be reserved for cases where you suspect deeper system corruption unrelated to display calibration specifically.
How Do I Fix My Misbehaving Touch Screen After Screen Repair
To fix a misbehaving touch screen after a Samsung S23 screen repair, first verify the repair was completed correctly by checking for proper screen seating and connector attachment, then test touch accuracy using the diagnostic menu (#0# → Touch). Recalibrate touch sensitivity in Settings → Display, and if issues persist, the digitizer may need professional recalibration or the repair may need to be redone.
Post-repair touch problems fall into a predictable set of patterns once you know what to look for. Phantom touches the screen registering taps you didn’t make often indicate a connector that isn’t fully seated. Dead zones in specific areas suggest either a hardware defect in the replacement part or debris trapped between layers during assembly. General sluggishness across the whole screen frequently points to a non-OEM digitizer with a lower touch sampling rate than the original part.
Common Touch Response Issues Post-Repair
The most frequently reported post-repair touch issues, in order of how often I see them mentioned, are: reduced touch sensitivity requiring harder presses than before, phantom or ghost touches appearing without contact, specific zones (often near the edges) failing to register touch, and a general lag between touching the screen and seeing the response on-screen. Each of these has a different root cause and a different fix, which is why diagnosing correctly before attempting a fix saves significant frustration.
Recalibrating Touch Sensitivity After New Screen Installation
For touch sensitivity issues specifically tied to a new screen installation, start by testing without any screen protector to isolate whether the protector or the screen itself is the issue. Then run the hardware diagnostic test by dialing #0# and selecting Touch drag your finger across the entire grid and note any zones that fail to register. If specific zones consistently fail in the diagnostic test, this confirms a hardware issue with the replacement part rather than a software calibration problem, meaning the fix requires going back to whoever performed the repair rather than further settings adjustments.
How Do I Recalibrate My Touchscreen Using Samsung Self Repair Assistant
Samsung Self Repair Assistant is a dedicated app available to customers who purchase genuine Samsung parts for self-repair. After installing a new screen, open the app, follow the guided calibration walkthrough which tests touch response across the display and writes corrected digitizer calibration values specific to your replacement part.
Samsung introduced Self Repair Assistant specifically to address the calibration gap that DIY repairs create. Before this tool existed, self-repaired Galaxy devices often retained calibration data written for the original factory screen, even after installing a genuine replacement causing exactly the kind of touch and sensor inaccuracies covered throughout this guide. The app exists to close that gap for users doing their own repairs with authentic parts.
What Samsung Self Repair Assistant Actually Calibrates
The app’s calibration process specifically addresses the under-display fingerprint sensor (re-registering its baseline against the new screen) and certain proximity sensor parameters that can shift when the screen assembly is replaced. It does not perform a full color calibration of the display panel that remains a manual process through Settings → Display as covered earlier in this guide. Understanding this scope matters because it sets correct expectations: Self Repair Assistant solves the hardware-coupling problem, not the color or brightness preferences problem.
Step-by-Step Self Repair Assistant Calibration Process
Download Samsung Self Repair Assistant from the Galaxy Store after purchasing your genuine replacement screen through Samsung’s official parts channel. Complete the physical screen installation following the included repair guide. Open Self Repair Assistant and select your device model confirm it matches your S23 variant exactly, as calibration data differs between the standard S23, S23+, and S23 Ultra. Follow the on-screen prompts, which include a guided fingerprint re-enrollment and a sensor verification sequence. Complete the process fully before using the device normally interrupting it partway can leave calibration data in an inconsistent state.
Is There a Way to Calibrate My Touch Screen Manually
Yes, manual touch screen calibration on the Samsung S23 is done through Settings → Display → Touch sensitivity, which adjusts the digitizer’s response threshold. There is no separate “touch calibration wizard” in current One UI versions manual calibration is accomplished through this sensitivity setting combined with testing via the hidden diagnostic menu.
Older Android and Samsung software versions included a dedicated touchscreen calibration utility with on-screen targets you’d tap to manually map touch accuracy. Samsung removed this in later One UI versions because modern digitizers are factory-calibrated with enough precision that manual point-mapping calibration became unnecessary for the vast majority of users the remaining adjustment needed is almost entirely about sensitivity threshold, which the Touch sensitivity toggle addresses.
Manual Touch Sensitivity Adjustment in Settings
The Touch sensitivity setting in Settings → Display is your primary manual control over touch response. Enabling it increases the digitizer’s sensitivity threshold, allowing it to register touches through the additional material of a screen protector or, in some cases, while wearing thin gloves. Disabling it returns to standard sensitivity, appropriate for bare-finger use without any protector. This single toggle is the extent of manual touch calibration available to regular users on current One UI software.
Testing Touch Accuracy After Manual Adjustment
After adjusting Touch sensitivity, verify the change actually improved your specific issue by testing systematically. Open the hidden diagnostic menu (#0#), select Touch, and drag your finger across every section of the test grid with the same screen protector and pressure you use normally. If zones that previously failed to register now respond correctly, the sensitivity adjustment resolved the issue. If problems persist in the same zones, the cause is something other than sensitivity threshold most likely a hardware issue or protector incompatibility.
How Can I Calibrate My Display — Screen Mode and Color Values
To calibrate your Samsung S23 display’s screen mode and color values, go to Settings → Display → Screen mode, choose Natural for accuracy or Vivid for visual impact, then tap Advanced settings to access the White balance slider and individual Red, Green, and Blue color value sliders for precise adjustment.
This is the core color calibration process for the Samsung Galaxy S23, and it’s worth understanding both halves of it the screen mode choice and the fine white balance adjustment because they solve different problems. Screen mode determines the overall color philosophy of your display (accurate versus vivid). White balance and RGB values fine-tune within whichever mode you’ve chosen to correct any remaining color temperature bias.
Vivid vs Natural Screen Mode After Repair
After a screen repair, comparing how Vivid and Natural modes render on your replacement screen versus your memory of the original screen can reveal calibration discrepancies. If colors in Natural mode look noticeably different from how your original screen displayed Natural mode, this suggests the replacement panel has different baseline color characteristics common with non-OEM parts and you may need to spend more time in the RGB sliders to compensate than you would have with an OEM replacement.
Adjusting RGB Color Values for Accurate Display
The RGB color value sliders, accessed by expanding the white balance control in Advanced settings, let you independently adjust red, green, and blue channel intensity. For accurate calibration, view a known neutral gray reference image and adjust each slider until the gray appears genuinely neutral no red tint, no blue tint, no green cast. This per-channel approach corrects color value imbalances that a single warm/cool slider can’t address, which is particularly important after a repair where the replacement screen’s color values may not perfectly match factory specifications.
How Do I Know If My Screen Is Calibrated Correctly
You know your Samsung S23 screen is calibrated correctly when neutral grays and whites appear genuinely neutral with no color tint, touch registers accurately across the entire screen with no dead zones or offset, and brightness adjusts smoothly without flickering or sudden jumps. Test using a neutral gray reference image for color and the #0# diagnostic touch test for touch accuracy.
Knowing whether your calibration is actually correct, rather than just assuming it is, requires a couple of simple verification steps rather than guesswork. These checks take a few minutes and give you a definitive answer rather than the vague sense that “something feels off” that usually prompts people to search for calibration help in the first place.
Signs Your Display Calibration Is Accurate
Accurate calibration shows up as consistency and neutrality. White backgrounds in apps appear genuinely white, not yellow-tinted or blue-tinted. Touch response feels immediate with no perceptible lag between contact and on-screen reaction. Brightness transitions smoothly when Adaptive brightness adjusts rather than jumping abruptly. Colors in photos match what you remember from viewing the same photos on other calibrated displays.
Warning Signs That Calibration Failed
Conversely, specific signs indicate calibration has failed or was never properly completed. A persistent color tint that doesn’t change regardless of screen mode selection suggests a panel-level issue beyond software adjustment. Touch that consistently registers offset from your actual finger position, confirmed through the diagnostic touch test, indicates a digitizer mapping problem. Brightness that flickers or jumps erratically, especially right after a repair, often points to a loose connection rather than a calibration setting.
How to Correct Display Issues After Screen Protector Installation
To correct display issues after installing a screen protector on your Samsung S23, first ensure the protector is applied without air bubbles, then enable Touch sensitivity in Settings → Display → Touch sensitivity to compensate for the added material layer. If the protector includes a privacy filter, be aware these can reduce touch accuracy more significantly than standard tempered glass.
Screen protector installation is one of the most common triggers for what feels like a calibration problem but is actually a compatibility issue between the protector and the digitizer’s sensitivity. Understanding this distinction matters because the fix is different from a true calibration problem you’re not correcting drift, you’re compensating for an added physical layer.
Touch Sensitivity Conflicts With Screen Protectors
Standard tempered glass screen protectors typically work fine with the S23’s default touch sensitivity, but thicker protectors or those with matte/anti-glare textures can reduce capacitive transmission enough to cause missed touches without the sensitivity adjustment. Privacy screen protectors, which use a microlouvre structure to restrict viewing angles, are the most likely to cause touch problems because their structure interferes with capacitive sensing more than standard glass.
Recalibrating Touch Response for Protector Compatibility
After installing any new screen protector, immediately enable Touch sensitivity if you haven’t already, then test touch accuracy across the full screen using normal typing and swiping motions before assuming there’s a deeper problem. If touch still feels inconsistent after enabling sensitivity mode, try removing the protector entirely and testing bare-screen touch accuracy if it’s perfect without the protector, the protector itself is incompatible with your specific digitizer (which may be a replacement part if you’ve had a repair) and needs to be replaced with a different product.
How Can I Calibrate My Screen for Free Using Built-In Tools
You can calibrate your Samsung S23 screen completely free using built-in tools Settings → Display for color, brightness, and touch sensitivity, and the #0# hidden diagnostic menu for hardware testing. No third-party app or paid service is required for standard software-level calibration.
Every meaningful calibration adjustment covered in this guide costs nothing and requires no additional downloads beyond what’s already on your Samsung Galaxy S23. This matters because a search for “calibrate my screen” often surfaces paid apps or services that promise calibration improvements they can’t actually deliver at the software layer your phone operates on.
Built-In Samsung Calibration Tools at No Cost
The complete free toolkit for S23 screen calibration includes Settings → Display → Screen mode for color profile selection, Advanced settings → White balance for color temperature, Settings → Display → Touch sensitivity for protector compatibility, Settings → Display → Brightness for manual and adaptive brightness control, and the #0# diagnostic menu for hardware verification testing. These five tools, all pre-installed and free, cover every calibration need a typical user encounters.
Why Third-Party Calibration Apps Aren’t Necessary
Third-party apps marketed for screen calibration generally work by overlaying a color filter on top of your display output they can’t access or modify the actual panel driver settings that Samsung’s built-in tools control directly. This means they’re working at a more superficial layer, often reducing actual display brightness and accuracy while claiming to improve it. For genuine Samsung S23 calibration, the built-in Settings app tools and diagnostic menu outperform any paid or free third-party alternative because they have direct access to the hardware abstraction layer that third-party apps simply don’t.
How to Calibrate Screen Resolution and Brightness Settings
To calibrate screen resolution on the Samsung S23, go to Settings → Display → Screen resolution and choose between FHD+ and QHD+ (Ultra model). For brightness calibration, use the brightness slider for manual control or enable Adaptive brightness under Settings → Display → Brightness for automatic adjustment based on ambient light.
Resolution and brightness are sometimes overlooked in calibration discussions because they’re not strictly “accuracy” settings the way color calibration is but they significantly affect how your display performs and how accurately it renders detail, making them part of a complete calibration approach.
Adjusting Resolution After Software Update
Software updates occasionally reset screen resolution to the default setting, which for most S23 models is FHD+ rather than the maximum available resolution. If your display seems less sharp after an update, check Settings → Display → Screen resolution and confirm it matches your previous preference. Higher resolution settings consume more battery, which is why Samsung defaults to the lower setting, but the choice is entirely yours to adjust back.
Brightness and Contrast Calibration for Accurate Display
For accurate brightness calibration, disable Adaptive brightness temporarily and manually set brightness to a comfortable level in your typical usage environment this becomes your baseline. Then re-enable Adaptive brightness and allow it to learn from this baseline rather than from whatever erratic adjustments occurred during a period of display problems. Contrast on AMOLED displays is inherently high due to true blacks, so contrast calibration mainly involves ensuring Vivid mode isn’t pushing contrast to an exaggerated level if you’re aiming for accurate rather than punchy visual output.
Software Conflicts and Cached Data — Hidden Causes of Calibration Failure
Software conflicts and cached data cause display calibration to fail or appear inconsistent when corrupted temporary files interfere with how the system applies your display settings. Clearing the system cache through Recovery mode and checking for conflicting apps that override display settings resolves most of these hidden calibration failures.
This is the category of calibration problem most commonly missed because it doesn’t show up as an obvious setting that’s wrong it shows up as settings that appear correct in the menu but aren’t actually being applied properly due to underlying software corruption.
How Software Conflicts Disrupt Display Calibration
Specific apps with their own display management features certain gaming optimization apps, third-party launchers, and some battery-saving utilities can override system-level display settings without clearly indicating they’re doing so. If your calibrated settings keep reverting or behaving inconsistently despite repeated correct adjustment, check recently installed apps for any that might include display, color, or performance optimization features and test disabling them to see if calibration stability improves.
Clearing Cached Data to Resolve Display Bugs
Beyond the full system cache wipe covered earlier, individual app caches can also cause display-related bugs, particularly with the camera app’s preview rendering or display-heavy apps that cache rendering data. Go to Settings → Apps, select the relevant app, tap Storage, and tap Clear cache. This is a safer, more targeted alternative to a full system cache wipe when you’ve isolated the issue to a specific app’s behavior rather than system-wide display rendering.
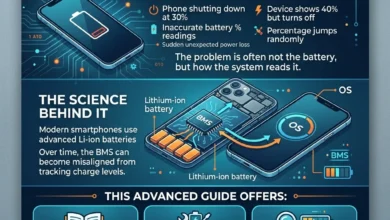
Battery Calibration Connection — Why Power Issues Mimic Screen Problems
Direct answer: Battery calibration issues can mimic screen calibration problems because low or inaccurately reported battery levels trigger power-saving display modes that reduce brightness, limit refresh rate, and alter color rendering making the screen appear miscalibrated when the actual issue is battery management reporting incorrect charge levels.
This connection trips up a lot of people because the symptoms genuinely overlap. A screen that seems dim, sluggish, or color-shifted might not need any display calibration at all, it might need battery calibration instead, because the system thinks battery is lower than it actually is and has activated power-saving display adjustments accordingly.
How Battery Calibration Affects Display Performance
When Samsung’s battery management system reports a low charge level even if inaccurate, it can automatically engage power-saving features that cap refresh rate, reduce maximum brightness, and shift the screen mode toward more battery-efficient color rendering. If you’re experiencing display performance that seems to fluctuate or degrade and your battery percentage readings have also seemed unreliable, the connection is likely real, and battery calibration (covered in depth in our complete S23 calibration guide) should be addressed alongside or before screen-specific fixes.
Distinguishing Battery Issues From Screen Calibration Issues
The clearest way to distinguish these is checking whether display problems correlate with battery percentage. If display oddities only occur or worsen as displayed battery percentage drops, especially if that percentage seems inaccurate compared to actual usage time remaining, you’re dealing with a battery calibration issue manifesting as a display symptom rather than a true screen calibration problem. If display issues persist consistently regardless of battery level or charging state, that points back to genuine screen calibration as the root cause.
Touch Response and Accessibility Settings After Repair
After a Samsung S23 screen repair, check Settings → Accessibility → Interaction and dexterity for settings that affect touch response, including Touch and hold delay and Interaction control, as these can compound with hardware changes from the repair to create touch response issues that aren’t purely calibration-related.
Accessibility settings exist to help users customize how touch interaction works for their specific needs, but they can also interact unexpectedly with a freshly repaired touchscreen in ways that mimic calibration failure when the actual cause is an accessibility setting that doesn’t suit the new screen’s response characteristics.
Accessibility Settings That Affect Touch Calibration
Several accessibility settings directly influence how touch input is processed: Touch and hold delay determines how long a press must be held before it’s registered as a long-press rather than a tap, which can feel like touch lag if set too long. Tap duration controls similarly affect how quickly the system recognizes a tap as complete. After a screen repair with a digitizer that has different response timing characteristics than the original, these settings may need adjustment to feel natural again.
Motions and Gestures Settings Interfering With Touch Response
Settings → Advanced features → Motions and gestures includes options like Palm swipe to capture and Double tap to wake that interpret specific touch patterns as commands. After a screen repair, if the replacement digitizer has slightly different palm or edge detection sensitivity, these gesture features can trigger unintentionally or fail to trigger when intended, creating an impression of erratic touch behavior that’s actually a gesture recognition mismatch rather than a fundamental calibration problem.
When Software Calibration Isn’t Enough — Hardware Repair Signs
Software calibration isn’t enough when display problems persist after trying all settings adjustments, cache clearing, and Self Repair Assistant calibration specifically when the diagnostic touch test consistently shows the same dead zones, when color tint remains regardless of white balance adjustment, or when issues began immediately after a repair and have never resolved through any software method.
Recognizing when you’ve exhausted software options is just as important as knowing the software fixes themselves, because continuing to chase settings adjustments for a genuinely hardware problem wastes time without ever solving the actual issue.
Signs Your Display Needs Professional Repair
Persistent dead zones confirmed through repeated diagnostic testing, color tints that don’t respond to any white balance adjustment, touch registration that’s consistently offset from actual finger position in a way that software sensitivity adjustment doesn’t fix, and any physical signs like visible gaps, lifting edges, or flickering that correlates with pressure on the screen all indicate hardware problems requiring professional attention rather than further calibration attempts.
What Samsung Self Repair Assistant Cannot Fix
Self Repair Assistant calibrates fingerprint sensor registration and certain proximity sensor parameters, but it cannot fix a genuinely defective digitizer, correct a panel with inherent color manufacturing defects, or resolve connection problems from improper physical installation. If you’ve completed the Self Repair Assistant process fully and issues persist, the problem is very likely physical rather than calibration-related, and the repair itself not the software needs to be revisited.
Model-Specific Calibration Differences Across Samsung Galaxy S23 Variants
Calibration settings and menu paths are largely identical across the Samsung Galaxy S23, S23+, S23 Ultra, and S23 FE, but the S23 Ultra has additional Vision booster settings, a larger fingerprint sensor area, and S Pen-specific calibration not present on other variants. Always confirm your exact model before applying any calibration data from guides or Self Repair Assistant.
While this guide’s instructions apply broadly across the S23 lineup, a few model-specific differences matter enough to call out directly, particularly because using the wrong model’s calibration assumptions can lead to confusion when settings paths or available features don’t match what you’re seeing.
S23 vs S23 Ultra Calibration Differences
The standard S23 and S23 Ultra share the same core Settings → Display calibration paths, but the Ultra adds Vision booster (an outdoor visibility enhancement not present on the standard model) and uses a larger QHD+ panel with different default resolution options. The Ultra’s larger fingerprint sensor area also means Self Repair Assistant’s fingerprint recalibration process takes a slightly different enrollment pattern than the standard S23’s smaller sensor zone.
S23+ and S23 FE Specific Considerations
The S23+ shares nearly identical calibration behavior with the standard S23, differing mainly in screen size rather than calibration features. The S23 FE, as a value-oriented variant released after the initial S23 lineup, runs the same One UI display settings but may have a different default screen mode out of the box and a slightly different touch sampling rate worth confirming through the #0# diagnostic menu rather than assuming identical specifications to the flagship models.
FAQs
How do I calibrate my Samsung phone screen?
Go to Settings → Display → Screen mode, select Natural for color accuracy, then open Advanced settings to adjust white balance and individual RGB sliders. For touch calibration, toggle Touch sensitivity based on whether you use a screen protector.
Can I recalibrate my phone screen after a repair?
Yes. Software-level color and touch sensitivity settings are always user-adjustable through Settings → Display. For hardware-level calibration tied specifically to a replacement screen, use Samsung Self Repair Assistant if you completed a self-repair with genuine parts.
How do I fix my inaccurate touch screen?
Clean the screen surface, enable Touch sensitivity if using a protector, and test using the #0# diagnostic menu’s touch zone test. If specific zones consistently fail, the issue is likely hardware-related and needs professional attention.
How do I reset my Samsung S23 screen after an update?
Go to Settings → Display and individually reset Screen mode to Natural and white balance to default. For a broader reset, use Settings → General management → Reset → Reset all settings, which restores all settings without erasing personal data.
How do I get my Samsung screen back to normal?
Restore Screen mode to your preferred default, reset brightness to automatic, and clear any custom white balance adjustments under Advanced display settings. Restart the device afterward to ensure changes apply fully.
How do I restart my Samsung Galaxy S23 when the screen is frozen?
Hold the Power button and Volume Down button together for 7 to 10 seconds until the device restarts. This force restart works even when the touchscreen is completely unresponsive and does not erase any data.
How do I recalibrate my touchscreen using Samsung Self Repair Assistant?
Download Self Repair Assistant from the Galaxy Store after a genuine parts self-repair, select your exact device model, and follow the guided calibration walkthrough that recalibrates fingerprint sensor registration and proximity sensor parameters specific to the new screen.
Is there a way to calibrate my touch screen manually?
Manual calibration is done through Settings → Display → Touch sensitivity, which adjusts the digitizer’s response threshold. Current One UI versions don’t include a separate tap-target calibration wizard sensitivity adjustment is the available manual control.
How do I know if my screen is calibrated correctly?
Check that neutral grays appear genuinely neutral with no color tint, touch registers accurately with no offset across the #0# diagnostic test, and brightness transitions smoothly without flickering or sudden jumps.
How can I calibrate my screen for free?
All meaningful Samsung S23 screen calibration is free through built-in tools, Settings → Display for color and touch sensitivity, and the #0# diagnostic menu for hardware verification. No paid app or service is necessary.
How do I fix display issues after installing a screen protector?
Ensure the protector is bubble-free, then enable Touch sensitivity in Settings → Display. If issues persist, test without the protector to confirm whether the protector itself is incompatible with your screen’s digitizer.
How does battery calibration relate to screen problems?
Inaccurate battery percentage reporting can trigger power-saving display modes that reduce brightness and alter color rendering, making the screen appear miscalibrated. Check whether display issues correlate with battery percentage before assuming a pure screen calibration problem.
What accessibility settings affect touch calibration after repair?
Settings → Accessibility → Interaction and dexterity includes Touch and hold delay and tap duration controls that can compound with a replacement digitizer’s different response timing, creating touch issues that aren’t purely calibration-related.
How do I calibrate screen resolution on Samsung S23?
Go to Settings → Display → Screen resolution and select between available options (FHD+ or QHD+ on Ultra models). Software updates occasionally reset this to default, so check it after any major update if display sharpness seems reduced.
When does a screen need professional repair instead of calibration?
When diagnostic testing through #0# consistently shows the same dead zones, when color tint doesn’t respond to any white balance adjustment, or when Self Repair Assistant’s full calibration process has been completed without resolving the issue.
Conclusion
Working through every angle of Samsung Galaxy S23 screen calibration after an update or repair, the pattern that keeps showing up is this: most problems people assume are deep, technical calibration failures are actually one specific setting reverted by an update, or one specific compatibility gap between a screen protector and a digitizer, or one specific hardware-coupling issue that Samsung built dedicated tools to solve.
The diagnostic approach matters more than memorizing every setting path. Figure out whether your issue started with an update or a repair that single fact narrows down the likely cause significantly. Test methodically using the #0# diagnostic menu before assuming the worst. Try the free, built-in tools fully before considering any paid alternative, because for this specific phone, the built-in tools are genuinely the most capable option available.
Where this guide draws a clear line is between what you can fix yourself and what needs Samsung’s official channels. Software settings color, brightness, touch sensitivity are entirely yours to adjust with zero risk. Hardware-coupled calibration after a genuine screen replacement has an official solution in Samsung Self Repair Assistant, and persistent issues that survive every software fix are telling you something real about the physical repair that needs to be addressed at the source, not calibrated around indefinitely.
If you’re dealing with other S23 sensors beyond the screen battery, fingerprint, compass, or S Pen our complete Samsung S23 calibration guide covers every component this device has, with the same direct, no-fluff approach applied throughout this screen-specific deep dive.
Also Read: