Samsung S23 Ultra Screen Calibration — Proven Guide
Samsung S23 Ultra Screen Calibration Complete Display Settings Guide

There’s a specific kind of frustration that comes with owning one of the best displays ever put in a smartphone and still feeling like it doesn’t look quite right. The Samsung Galaxy S23 Ultra ships with a 6.8-inch Dynamic AMOLED 2X panel capable of 2200 nits peak brightness, QHD+ resolution, and Delta E color accuracy under 2 — professional-grade display hardware sitting in your pocket. But hardware potential and realized performance are two different things, and without the right calibration, even this panel underperforms what it’s genuinely capable of. This guide is the complete answer to that gap. If you want the full picture of every sensor and calibration type across the entire S23 series, our Samsung S23 calibration covers everything from battery to fingerprint to gyroscope. This article goes deep on one specific subject: getting the S23 Ultra’s display calibrated to its actual potential.
What Makes Samsung S23 Ultra Screen Calibration Different From Standard S23
The Samsung S23 Ultra requires different calibration considerations than the standard S23 because of its larger 6.8-inch QHD+ panel, the exclusive Vision Booster outdoor mode, its higher 2200-nit peak brightness ceiling, and additional resolution options that directly affect sharpness and battery performance. Calibrating the Ultra well means understanding hardware capabilities that simply don’t exist on the standard model.
The S23 Ultra isn’t just a bigger S23 — it’s a meaningfully different display proposition. The panel is larger, brighter, and sharper. It has features the standard S23 doesn’t ship with. And it costs significantly more, which means the people using it often have professional or creative demands on their display that casual users don’t — photo editing, video review, color-sensitive design work, extended outdoor use. These use cases demand calibration precision that generic display guides don’t address.
The calibration decisions that matter most on the S23 Ultra are different from those on the standard model. Resolution choice between QHD+ and FHD+ is a decision only Ultra users face. Vision Booster is exclusive to the Ultra. The Delta E accuracy discussion becomes relevant precisely because this panel is capable of hitting professional thresholds — a conversation that doesn’t make sense for panels that can’t. The S23 Ultra’s display is one of the few smartphone screens where calibration genuinely changes what the hardware delivers rather than just adjusting cosmetic preferences.
Understanding these differences before diving into settings prevents the common mistake of applying generic Samsung calibration advice to a display that deserves more specific treatment. Every setting discussed in this guide is specific to the S23 Ultra’s hardware characteristics — not generic advice that works on any Galaxy device.
QHD+ vs FHD+ Resolution — How It Affects Calibration
The Samsung S23 Ultra offers two resolution modes: QHD+ at 3088 × 1440 pixels and FHD+ at 2316 × 1080 pixels. This choice affects not just sharpness but how the display renders fine text, image detail, and color gradients — all of which are calibration-relevant factors. At QHD+, the pixel density of 500 ppi means individual pixels are genuinely imperceptible at normal viewing distances, and the display renders content at its native sharpness. At FHD+, the display is scaling down from native resolution, which introduces a small amount of softening that affects how calibrated color accuracy is actually perceived.
For most calibration purposes — particularly color accuracy work like photo editing or video review — QHD+ is the appropriate resolution setting because it eliminates the rendering approximation that FHD+ introduces. The battery cost of running QHD+ versus FHD+ is real but modest on the S23 Ultra’s 5000mAh cell. The display sharpness difference is most visible in fine text, detailed textures, and precise color boundaries — exactly the areas where calibration quality matters most.
6.8-Inch AMOLED Panel — Calibration Implications of a Larger Display
The S23 Ultra’s 6.8-inch panel is large enough that display uniformity — how consistently color and brightness are rendered across the full screen surface — becomes a more significant calibration consideration than on smaller displays. On a 6.1-inch panel, minor uniformity variations are barely perceptible. On a 6.8-inch panel, the same variation is more visible because the affected area covers a larger portion of the display surface.
AMOLED panels inherently have better uniformity than LCD because each pixel generates its own light rather than depending on a backlight, but no display is perfectly uniform. When calibrating the S23 Ultra, testing your calibration settings across the full display surface — including corners and edges — is worth doing because the center calibration you’re adjusting to may not represent how the panel renders at the extremes. This is particularly relevant for photo editing use where uniform color rendering across the entire image area matters.
How to Calibrate Samsung S23 Ultra Screen — Step by Step
To calibrate the Samsung S23 Ultra screen, go to Settings → Display → Screen mode, select Natural for color accuracy, open Advanced settings to adjust white balance and RGB sliders, set resolution to QHD+ under Screen resolution, enable adaptive brightness, and configure Vision Booster under Display for outdoor use. Complete each step in sequence and restart the device to apply all changes cleanly.
Before walking through each setting individually, the sequence matters. Display settings interact with each other — white balance calibration performed in Vivid mode produces different results than the same adjustment in Natural mode, because the color rendering pipeline is different between modes. Setting screen mode first, then fine-tuning within it, produces coherent results. Adjusting settings in random order often leads to a calibrated white balance that looks wrong when you realize you had the wrong screen mode selected throughout.
The complete calibration sequence for the S23 Ultra takes about ten minutes done carefully and produces results that remain stable until your next major software update or hardware change. Worth doing once properly rather than repeatedly tweaking without a systematic approach.
Accessing Display Calibration Settings on S23 Ultra
All primary display calibration settings on the S23 Ultra live under Settings → Display. From here you access Screen mode (containing the color profile selector and Advanced settings for white balance and RGB values), Brightness (containing both the manual slider and Adaptive brightness toggle), Screen resolution (QHD+ or FHD+ selection), and subsidiary features including Motion smoothness, Eye comfort shield, Adaptive color tone, and Vision Booster. The hidden diagnostic menu — accessed by dialing #0# in the Phone app — provides hardware-level display testing outside the standard Settings interface.
First Steps Before Touching Any Settings
Before adjusting a single setting, take two preparatory steps. First, view your current display in your typical usage lighting environment — not artificially bright or dark — and note specifically what looks wrong. Is it color temperature (too warm/cool)? Saturation (too much/too little)? Brightness behavior? Knowing exactly what you’re fixing prevents the common mistake of adjusting everything and creating new problems while solving the original one.
Second, disable Adaptive color tone before calibrating. This feature continuously shifts the display’s color temperature to match ambient light, which means your white balance adjustments will appear different every time the lighting in the room changes. Calibrate with Adaptive color tone off, confirm results, then decide whether to re-enable it based on whether you want that dynamic adjustment active during normal use.
Samsung S23 Ultra Screen Mode Calibration — Natural vs Vivid
For color-accurate Samsung S23 Ultra screen calibration, select Natural mode under Settings → Display → Screen mode. Natural mode targets the sRGB color space and achieves Delta E under 2 when properly white balance calibrated. Vivid mode extends beyond sRGB to approximately 140% saturation and should be used for entertainment and gaming rather than color-sensitive work.
The screen mode decision is the single most important calibration choice you make on the S23 Ultra, and it’s the one most users get wrong — not because they made a bad decision, but because Samsung’s default Vivid mode is designed to look impressive in retail environments, not to represent content accurately. Vivid mode’s oversaturation is immediately appealing. Natural mode, by comparison, initially looks muted to eyes accustomed to oversaturation. This adaptation effect is the reason people sometimes switch back to Vivid after trying Natural — the initial perception of Natural as “washed out” is actually your eyes adjusting to accurate color rather than the display losing quality.
The professional approach is to use Natural mode as your calibration base, fine-tune white balance within it until neutral tones appear genuinely neutral, and then give your visual system two to three days to adapt. Most users who persist through this adaptation period find they prefer Natural mode’s accuracy and start noticing the artificiality of Vivid mode when they encounter it afterward.
When to Use Natural Mode on S23 Ultra
Natural mode is the correct choice for any use case where color accuracy matters — photo editing and review, video color grading, graphic design work, professional document review, and any situation where you need what you see on screen to match what others will see on calibrated displays or in print. It’s also the appropriate mode for extended reading and low-light use because its lower saturation and more accurate color rendering is easier on the eyes over time than the high-saturation Vivid rendering.
When Vivid Mode Is Actually the Right Choice
Vivid mode genuinely serves certain use cases better than Natural. Gaming benefits from Vivid’s higher contrast and saturation because game environments are designed for visual impact rather than accuracy. Social media consumption, where content is already optimized for oversaturated viewing, looks better in Vivid because you’re seeing it as the creator intended for entertainment purposes. For general entertainment — casual video, browsing, social feeds — Vivid’s higher visual energy is a legitimate preference rather than a calibration mistake. The key is making this choice deliberately rather than leaving Vivid active by default and wondering why your photos look washed out on other screens.
Samsung S23 Ultra Color Calibration — White Balance and RGB Values
To calibrate color on the Samsung S23 Ultra, go to Settings → Display → Screen mode → Advanced settings. Use the white balance slider for quick warm/cool adjustment or expand to individual Red, Green, and Blue channel sliders for precise per-channel calibration. View a known neutral gray reference image while adjusting — when the gray appears genuinely neutral with no color tint, white balance calibration is complete.
White balance is the dimension of color calibration that affects every color on the display simultaneously. When white balance is off, neutral tones like white and gray carry a color cast — and so does every other color on the screen, because all colors are rendered relative to white. A yellow-tinted white point makes blues appear greenish and skin tones appear orange. A blue-tinted white point makes warm colors appear washed out. Correcting white balance first creates the accurate foundation that all other color calibration depends on.
The S23 Ultra’s white balance controls operate at the display driver level — they’re modifying how the panel actually renders color at the hardware interface, not overlaying a filter on top of existing output. This is why Samsung’s built-in white balance calibration is more effective than any third-party app, which can only operate at the application layer and inevitably sacrifices brightness to apply color shifts.
Using the White Balance Slider for Quick Adjustment
The basic white balance slider in Advanced settings offers a single Cool-to-Warm adjustment. The Cool end of the slider pushes the display toward blue, targeting approximately 6500K color temperature — the standard D65 daylight white point used in digital content mastering. The Warm end pushes toward amber, producing a warmer, yellower display that reduces blue light emission. The Neutral midpoint is Samsung’s attempt at a balanced default that suits most conditions.
For users who want to align their S23 Ultra’s white balance with professional display standards, position the slider slightly toward Cool and slightly left of center. This targets the D65 standard and produces the most accurate rendering of digital content created on calibrated professional monitors. Test this against a white web page — if it looks genuinely white without warmth or coolness, you’ve hit the target.
Fine-Tuning RGB Color Values for Precise Accuracy
When the single warm/cool slider isn’t sufficient — because your display has a color imbalance that’s more complex than a simple temperature shift — the individual Red, Green, and Blue channel sliders provide per-channel control. Access these by tapping the expansion arrow below the basic white balance slider in Advanced settings.
These sliders let you independently reduce or increase each color channel’s output. If your display has a green tint, reduce the Green slider. If it’s slightly red even after cooling down the basic white balance, reduce Red. The correct approach is to view a neutral gray reference image — RGB 128,128,128 on any color picker tool — and adjust each channel until the gray appears genuinely neutral. Start with the channel that produces the most obvious cast, reduce it slightly, then reassess. Small adjustments of two to three units at a time prevent overcorrection.
Samsung S23 Ultra Delta E Accuracy — What It Means for You
The Samsung S23 Ultra achieves Delta E under 2 in Natural mode — meaning its color rendering is within the professional accuracy threshold of 2 units of perceptible color difference. In practical terms, this means colors on the S23 Ultra’s calibrated display are close enough to their true values that most professional color work can be confidently performed on this screen.
Delta E is the numerical measure of color difference — how far a displayed color is from its target value in a three-dimensional color space. A Delta E of 0 means the displayed color is a perfect match to the target. A Delta E under 1 is imperceptible to the human eye. A Delta E under 2 is the professional standard for display accuracy — colors are accurate enough for professional color-sensitive work. A Delta E above 3 indicates visible color inaccuracy.
The S23 Ultra achieving Delta E under 2 in Natural mode is a meaningful specification, not marketing language. It means this panel genuinely competes with purpose-built color-accurate displays for professional work — something that was not true of smartphone displays even five years ago. But this specification only holds when Natural mode is properly calibrated with correct white balance. In Vivid mode, the S23 Ultra deliberately exceeds Delta E 2 because accuracy is not the goal in that mode — visual impact is.
What Delta E Under 2 Actually Means in Practice
For everyday users, Delta E under 2 means photos reviewed on the S23 Ultra’s calibrated display accurately represent how they’ll appear on other calibrated screens and in print. For photographers, this is the threshold at which you can trust the display for editing decisions rather than just approximate work. For designers, it means colors selected on the S23 Ultra reliably translate to their intended values in print and digital output.
What Delta E under 2 doesn’t mean is that the display is perfectly accurate for all professional applications. High-end color grading work for cinema still requires certified reference monitors with Delta E under 1. For most professional photography, graphic design, and content creation, the S23 Ultra’s calibrated accuracy is genuinely sufficient — and significantly better than any laptop display that doesn’t specifically target color accuracy.
How to Verify Your S23 Ultra Is Hitting Delta E Targets
Without a colorimeter, you can approximate Delta E verification using a reference comparison method. Find a known color reference — a Pantone color chip in its digital representation, or a professional color test chart image — and compare how the S23 Ultra renders it in Natural mode against a calibrated monitor if available. For a simpler test, the Grayscale step test (a gradient from pure black to pure white through equal gray steps) reveals tonal accuracy and white point — a well-calibrated S23 Ultra should render all gray steps as neutral without color casts at any point in the gradient.
Samsung S23 Ultra Vision Booster Calibration
Vision Booster on the Samsung S23 Ultra is an adaptive outdoor display mode that enhances visibility in direct sunlight by increasing brightness and adjusting color rendering for legibility under bright ambient light. Enable it through Settings → Display → Vision Booster. For accurate color calibration indoors, disable Vision Booster — it’s designed for outdoor readability, not color accuracy.
Vision Booster is one of the most useful features exclusive to the S23 Ultra, and one of the most misunderstood from a calibration perspective. It is not a standard brightness boost — it’s an intelligent display adjustment that modifies both luminance and color rendering simultaneously to maintain legibility and visual clarity under direct sunlight conditions. When active in full sunlight, it does things to your display’s color rendering that would look wrong indoors but are specifically optimized for outdoor viewing conditions.
This context-specific nature is why treating Vision Booster as a global display calibration option is a mistake. It’s a situational tool for a specific environment, not a universal display enhancement. Users who leave Vision Booster active indoors often experience a display that appears artificially boosted in color and contrast — because it is, and those adjustments are appropriate for sunlight but wrong for controlled indoor environments.
What Vision Booster Does to Display Output
When Vision Booster activates — either automatically in bright ambient light or manually through the Display settings — it increases peak brightness toward the S23 Ultra’s 2200-nit ceiling, adjusts display color rendering to maintain contrast against ambient light, and modifies the panel’s tone mapping to prevent the visual washout that high ambient light causes on standard display settings. The result is a screen that remains readable and visually clear in conditions that would render most smartphone displays nearly invisible.
The color rendering changes Vision Booster applies are calibrated specifically for sunlight viewing — they compensate for the way direct sunlight affects color perception by making specific adjustments that wouldn’t be appropriate in controlled lighting. This is technically a form of ambient-light-responsive calibration, similar in principle to Adaptive color tone but operating at much higher brightness levels and with more aggressive rendering changes.
When to Enable and Disable Vision Booster
Enable Vision Booster when you’re outdoors in direct sunlight or in any high-brightness environment where the standard display settings produce a screen that’s difficult to see clearly. Disable it when you’re indoors, in controlled lighting, doing color-sensitive work, or whenever display color accuracy matters more than outdoor visibility. If you use Vision Booster on auto mode, it manages these transitions automatically based on ambient light sensor readings — the most convenient approach for users who move between indoor and outdoor environments frequently.
Samsung S23 Ultra AMOLED Calibration for Photo Editing
For accurate photo editing on the Samsung S23 Ultra, set Screen mode to Natural, disable Adaptive color tone, disable Vision Booster, set brightness to manual at 60-80% in a controlled lighting environment, calibrate white balance to neutral, and ensure QHD+ resolution is active. These settings produce the most accurate, consistent display output for evaluating image color and exposure.
Photo editing on a smartphone display was considered a professional compromise until panels like the S23 Ultra’s arrived. At calibrated Delta E under 2 in Natural mode, the S23 Ultra’s display is genuinely capable of supporting photography editing decisions — not just rough adjustments, but actual quality work. The limiting factor is no longer the display hardware. It’s whether the software settings are configured to let that hardware perform accurately.
The most important photo editing calibration insight for the S23 Ultra is that every automatic display adjustment — Adaptive brightness, Adaptive color tone, Vision Booster, Eye comfort shield — introduces variability that undermines calibration consistency. For serious editing work, disable all of these, set manual brightness, and work with a static calibrated display rather than an adaptive one. The adaptive features are excellent for casual use, but they’re incompatible with the stable, known conditions that professional color work requires.
Best Display Settings for Accurate Photo Review
For photo review and editing specifically, the optimal S23 Ultra display configuration is: Screen mode set to Natural, Adaptive color tone off, Vision Booster off, Eye comfort shield off, Adaptive brightness off with manual brightness set to 70% in typical room lighting, QHD+ resolution active, and white balance calibrated to neutral using the RGB sliders. This creates the most stable and accurate display environment the S23 Ultra can provide for color-sensitive work.
Enable HDR video in the Advanced settings toggle to ensure HDR-encoded images are rendered with correct tone mapping rather than being downgraded to SDR output. While this was designed for video, it also affects how HDR photos from the S23 Ultra’s own camera system are rendered in the gallery and editing apps — keeping it enabled means you’re reviewing photos with their full dynamic range intact.
DCI-P3 Color Space and Photo Mode on S23 Ultra
The Photo screen mode on the S23 Ultra targets the DCI-P3 color space — the wider-gamut standard used in cinema and increasingly in professional photography. If your photo editing workflow involves DCI-P3 content specifically — editing for streaming platforms, cinema output, or modern wide-gamut photography — Photo mode provides a more appropriate color space rendering than Natural’s sRGB target.
The practical difference between Natural and Photo mode for everyday photography is subtle for most images but becomes meaningful for highly saturated colors — reds, deep blues, rich greens — which render closer to their actual wide-gamut values in Photo mode than in Natural’s sRGB-limited rendering. If you shoot on the S23 Ultra and review on the same device, Photo mode shows you a more accurate representation of what the camera actually captured in its wide-gamut format.
Samsung S23 Ultra HDR Display Calibration
To calibrate HDR display on the Samsung S23 Ultra, go to Settings → Display → Advanced settings and enable HDR10+ video. For HDR streaming content, set Screen mode to Video for DCI-P3 color rendering with motion optimization. For HDR photo viewing, enable HDR video in Advanced settings while keeping Screen mode at Natural or Photo.
HDR — High Dynamic Range — is where the S23 Ultra’s display capabilities become genuinely remarkable. The combination of AMOLED’s true blacks, peak brightness of 2200 nits, and HDR10+ certification means the panel can render HDR content with a dynamic range that approaches reference HDR display specifications. But this capability requires the right calibration settings to fully realize — a poorly configured S23 Ultra can display HDR content in a way that’s barely distinguishable from standard dynamic range.
HDR calibration on the S23 Ultra involves two layers: ensuring the display is set to accept and render HDR signals correctly, and ensuring the color mode settings don’t restrict the wide color gamut that HDR content uses. HDR content encoded in the BT.2020 color space requires a display capable of wide-gamut rendering — the S23 Ultra’s panel covers this, but only when the Screen mode is set appropriately and the HDR video toggle is enabled.
Enabling HDR10+ on Samsung S23 Ultra
HDR10+ enabling on the S23 Ultra is done through Settings → Display → Advanced settings → HDR+ mode. When this toggle is active, the display applies dynamic tone mapping to HDR10+ encoded content — adjusting the rendering frame by frame rather than using a single static tone map for the entire piece of content. This produces significantly better HDR rendering quality for compatible content, particularly in scenes that transition between very bright and very dark elements.
Streaming services that support HDR10+ on the S23 Ultra include Amazon Prime Video and select Netflix content — confirm your subscription tier supports HDR streaming and that the Samsung S23 Ultra is on the service’s certified device list for HDR playback. Without certification, content may stream at lower quality regardless of display settings.
Best Settings for HDR Video Streaming Accuracy
For HDR streaming calibration specifically, the optimal S23 Ultra settings are Screen mode set to Video (which provides DCI-P3 rendering optimized for motion content), HDR10+ enabled in Advanced settings, Adaptive brightness on (HDR content benefits from the display dynamically adjusting to ambient light rather than competing with fixed manual brightness), and Vision Booster off unless watching outdoors.
Samsung S23 Ultra Brightness Calibration
For Samsung S23 Ultra brightness calibration, use manual brightness at 70% in typical indoor conditions for color-accurate work, and enable Adaptive brightness for casual everyday use. For outdoor use in direct sunlight, enable Vision Booster to access the full 2200-nit peak brightness ceiling that standard Adaptive brightness doesn’t reach on its own.
Brightness calibration on the S23 Ultra is a balance between display accuracy and practical usability. At very low brightness, AMOLED panels exhibit a phenomenon called PWM dimming — they rapidly pulse the display on and off at low frequency to simulate lower brightness rather than genuinely reducing pixel output. Some users sensitive to this flickering experience eye fatigue at very low brightness settings. If you notice this on your S23 Ultra, setting a brightness floor slightly higher than the minimum eliminates the most aggressive PWM dimming.
At very high brightness in a dark environment, the S23 Ultra’s display can appear color-shifted due to how AMOLED panels manage peak brightness across the full panel versus localized bright areas. For consistent color accuracy, calibrate and review your display settings at the brightness level you actually use for that activity — don’t calibrate at full brightness for a task you perform at medium brightness.
Manual Brightness vs Adaptive Brightness — Which to Use
Manual brightness is appropriate when you need consistent, predictable display behavior — photo editing, professional color review, any calibration verification. Set it and it stays set regardless of ambient light changes. Adaptive brightness is appropriate for everything else — it continuously adjusts to maintain comfort and battery efficiency as your environment changes, and over time it learns your preferences and anticipates adjustments before you make them manually.
The S23 Ultra’s Adaptive brightness algorithm is sophisticated enough that most users who give it a week to learn their habits find it more consistently comfortable than manual brightness. The catch is that during the learning period — particularly if you’ve recently reset the adaptive brightness model — it can make surprising adjustments that look like display inconsistency but are actually the algorithm updating its model.
Peak Brightness Performance and Outdoor Visibility Settings
The S23 Ultra’s peak brightness of 2200 nits is only available in specific conditions — typically in small, bright areas of the image (like a white sun in a blue sky) rather than across the full panel simultaneously. Full-panel peak brightness is lower, around 1200-1500 nits. Both figures are exceptional for smartphone displays and more than sufficient for outdoor legibility. Vision Booster unlocks the highest available full-panel brightness for outdoor conditions, combined with its color rendering adjustments that maintain visibility in direct sunlight.
Samsung S23 Ultra QHD+ Resolution Calibration
Set Samsung S23 Ultra display resolution to QHD+ under Settings → Display → Screen resolution for maximum sharpness and the most accurate representation of your display’s native capabilities. FHD+ is appropriate when battery life is a priority and you’re not doing detail-sensitive or color-critical work.
Resolution is sometimes overlooked in display calibration discussions because it’s not a color or touch accuracy setting — but it directly affects how your calibrated color work actually looks. At FHD+, the S23 Ultra scales its content from native QHD+ down to FHD+ resolution, introducing a very subtle softening that’s most visible in fine text, sharp edges, and detailed textures. For calibrated color work where you want to see your image at its most accurate, QHD+ removes this scaling artifact entirely.
The battery impact of QHD+ versus FHD+ on the S23 Ultra’s 5000mAh battery is approximately 10-15% more battery consumption at the higher resolution — meaningful if you’re pushing the device hard through a full day, but manageable for most users given the cell size.
Should You Use QHD+ or FHD+ on S23 Ultra
QHD+ for detail-sensitive work, photography, professional review, and situations where you want the display performing at its native capability. FHD+ for extended usage days when battery life is more important than maximum sharpness, for gaming (where the performance overhead of QHD+ may affect frame rates in demanding titles), and for general casual use where the resolution difference is imperceptible in practice.
Software updates occasionally reset the resolution back to FHD+ — Samsung’s power-saving default — which is one of the most common causes of an S23 Ultra that “looked sharper before the update.” Check Settings → Display → Screen resolution after every major update and restore QHD+ if it’s been reset.
How Resolution Choice Affects Display Sharpness and Battery
At QHD+ (500 ppi), the S23 Ultra’s pixel density means individual pixels are completely imperceptible at normal viewing distance. Text renders with crisp, sharp edges. Fine image detail is fully resolved. At FHD+ (395 ppi), the rendering is still above the threshold where individual pixels become visible, but fine text shows a slight softening and detailed images show reduced sharpness at close inspection. For most everyday use, the difference is subtle. For professional or close-inspection use, QHD+ is clearly superior.
Samsung S23 Ultra Adaptive Color Tone — Calibration or Interference
Samsung S23 Ultra Adaptive color tone automatically adjusts display color temperature to match ambient lighting conditions, which improves visual comfort but reduces color accuracy. Disable it at Settings → Display → Adaptive color tone when doing color-sensitive work, and re-enable it for general comfortable everyday use.
Adaptive color tone is technically a form of real-time calibration — it samples ambient light color temperature through the device’s color spectrum sensor and adjusts the display’s white point to reduce the perceptual gap between the display and the environment. This makes the display look more natural within its environment because your eyes adapt to the ambient lighting, and a display with the same color temperature as the environment appears more consistent.
The problem for calibration purposes is that Adaptive color tone introduces variability. A display calibrated to neutral white balance with Adaptive color tone on will appear different in different lighting environments — which is exactly the behavior the feature intends. For color accuracy work, this variability is the opposite of what you need.
What Adaptive Color Tone Actually Does
The S23 Ultra’s color spectrum sensor samples the wavelength distribution of ambient light and calculates the room’s color temperature. Adaptive color tone then shifts the display’s white point toward that ambient temperature, reducing the contrast between the display and environment. Under warm incandescent lighting, the display shifts warmer. Under cool daylight, it shifts cooler. Under fluorescent office lighting, it applies a compensating adjustment for that light’s characteristic color cast.
When to Disable It for Consistent Color Accuracy
Disable Adaptive color tone any time you need to assess color accurately — photo review, video color evaluation, design work, or calibration verification. With it off, your manually calibrated white balance settings are what the display actually uses, producing consistent output regardless of what the lights in the room are doing. Re-enable after the color-sensitive session to restore the comfortable adaptive behavior for general use.
Samsung S23 Ultra Eye Comfort Shield and Blue Light Calibration
Eye comfort shield on the Samsung S23 Ultra reduces blue light emission by warming the display’s color temperature, which reduces eye fatigue during extended nighttime use but significantly reduces color accuracy. Do not use Eye comfort shield during color-sensitive work — disable it under Settings → Display → Eye comfort shield for any session where display accuracy matters.
Blue light reduction and color accuracy are fundamentally in opposition, because reducing blue light means reducing the blue channel’s output — which shifts the white point toward warm amber and changes how every color is rendered. Eye comfort shield is excellent for what it does — reducing eye fatigue during late-night reading or phone use before sleep — but it’s incompatible with calibrated color use.
How Eye Comfort Shield Affects Color Accuracy
Eye comfort shield shifts the S23 Ultra’s display toward the warm end of the color temperature spectrum, which can range from a subtle shift at minimum intensity to a dramatically warm yellow-orange tint at maximum. Even at minimum intensity, the blue channel reduction is perceptible on a properly calibrated display. Users who wonder why their S23 Ultra’s display looks yellow after previously appearing neutral should check whether Eye comfort shield has been accidentally enabled or scheduled.
Balancing Eye Comfort With Display Calibration Accuracy
The practical approach is scheduling — Samsung’s Eye comfort shield includes a scheduling option that automatically enables it at a set time in the evening and disables it in the morning. Configure the schedule to align with your actual nighttime use hours, and the feature runs automatically during low-light evening sessions without affecting daytime calibration accuracy. This eliminates the need to remember to enable and disable it manually while capturing the genuine benefit for sleep quality during late-night phone use.
Samsung S23 Ultra Screen Calibration After Software Update
After a Samsung S23 Ultra software update, check and restore these four settings that updates commonly reset: Screen mode (check under Settings → Display → Screen mode), resolution (Settings → Display → Screen resolution), white balance (Settings → Display → Screen mode → Advanced settings), and Touch sensitivity (Settings → Display → Touch sensitivity). Five minutes of verification after every major update prevents days of wondering why the display feels off.
Samsung’s software updates frequently include display subsystem changes that can silently modify calibration parameters. Some of these changes are intentional improvements — updated color science, revised default settings. Some are unintentional regressions — settings reverting to defaults. Knowing which settings are most likely to be disturbed by updates focuses your post-update verification rather than requiring a complete recalibration every time.
Which Update-Related Display Changes Are Expected
Expected changes after updates include default screen mode reverting to Vivid if Samsung considers Vivid the appropriate default for new settings introduced in the update, Adaptive color tone behavior adjustments as Samsung refines the algorithm, HDR rendering quality improvements that change how HDR content appears even on unchanged settings, and Auto-brightness algorithm refinements that may temporarily behave differently from learned patterns until it re-adapts.
Which Changes Indicate a Calibration Problem
Unexpected changes requiring recalibration include a color tint that persists regardless of white balance adjustment (suggesting a rendering pipeline issue), touch sensitivity that feels different across the full screen after excluding protector-related causes, and any setting that doesn’t hold after reapplying — reverting to a different state after each restart indicates a software conflict overriding your settings rather than a calibration issue.
Samsung S23 Ultra Touch Screen Calibration and Sensitivity
Samsung S23 Ultra touchscreen sensitivity is adjusted at Settings → Display → Touch sensitivity. The S23 Ultra’s 240Hz touch sampling rate provides sub-millisecond touch response accuracy, which makes calibration problems more immediately perceptible than on lower-sampling-rate devices. Use the #0# diagnostic touch test to verify touch accuracy across the full 6.8-inch surface.
The S23 Ultra’s 240Hz touch sampling rate is worth understanding in calibration terms — it means the digitizer samples your touch position 240 times per second, which is why touch response feels immediate and precise. When touch calibration is off on the S23 Ultra, it’s more obviously wrong than on devices with lower sampling rates, because the high-frequency sampling means offset or delayed response is immediately perceptible rather than being masked by slower detection.
Touch Sensitivity Settings Specific to S23 Ultra
The Touch sensitivity toggle under Settings → Display compensates for screen protectors and glove use by raising the digitizer’s sensitivity threshold. On the S23 Ultra’s larger 6.8-inch panel, touch sensitivity issues can manifest differently across different areas of the screen — the center may respond correctly while edge areas show reduced sensitivity, particularly if a screen protector isn’t perfectly flat across the curved edge areas of the display.
240Hz Touch Sampling Rate and Its Calibration Implications
The 240Hz sampling rate means the S23 Ultra captures touch position with very high temporal accuracy — but this also means any systematic offset in digitizer calibration (where taps consistently register slightly away from the actual touch point) is immediately apparent because the high-frequency sampling faithfully reproduces the offset rather than averaging it away. If your S23 Ultra shows consistent touch offset across the full display in the #0# test, this points to a digitizer calibration issue that may require professional service rather than a software sensitivity adjustment.
Samsung S23 Ultra Screen Calibration Using Diagnostic Menu
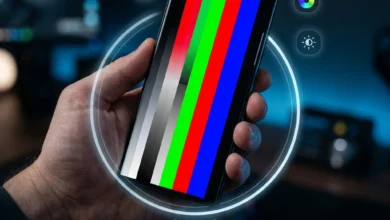
Access the Samsung S23 Ultra’s hidden diagnostic menu by opening the Phone app and dialing #0#. From the test menu, use the Screen tests to check color channel output (Red, Green, Blue tests individually), the Touch test to verify full-surface touch accuracy, and the Sensor test to check proximity and ambient light sensor function. Exit by pressing the back button or home button.
The #0# diagnostic menu on the S23 Ultra is the same hardware test interface available across the S23 lineup — it doesn’t have Ultra-specific tests, but it provides hardware-level verification that your software calibration settings are actually being applied correctly at the display driver level.
Accessing #0# Menu on S23 Ultra
Dial #0# directly in the Samsung Phone app dialer. The characters must be typed exactly — asterisk, hash, zero, asterisk, hash. The menu opens immediately without completing a call. Navigation is by tapping the labeled buttons. To exit any individual test, press the physical back button. To exit the diagnostic menu entirely, press Home. Note that the Screen color tests (Red, Green, Blue) display solid full-screen color panels — this is expected behavior, not an error.
Which Tests Are Most Useful for Display Verification
For screen calibration verification specifically, run the Red, Green, and Blue channel tests to confirm each color channel is rendering uniformly across the full panel — any dark patches, bright spots, or non-uniform areas are hardware panel issues beyond software calibration’s reach. Run the Touch test by dragging across every section of the grid to verify full-surface touch accuracy. Run the Sensor test to confirm the ambient light and proximity sensors are functioning correctly, as their accuracy affects Adaptive brightness and Vision Booster performance.
Best Display Settings for Samsung S23 Ultra — Calibrated Recommendations
The best display settings for the Samsung S23 Ultra depend on your primary use case. For color accuracy: Natural mode, neutral white balance, QHD+, Adaptive color tone off. For entertainment: Vivid mode, QHD+, HDR10+ on, Adaptive brightness on. For gaming: Vivid mode, FHD+ for performance headroom, Touch sensitivity matched to protector status. For outdoor use: Any mode with Vision Booster enabled.
Rather than one universal configuration, the S23 Ultra’s calibration is best approached as a few saved mental presets for different activities. Most users have two to three primary use cases — casual everyday use, photo or professional work, and entertainment — and the optimal settings differ enough between them that knowing which configuration to apply when is more useful than searching for a single “best” setting.
Recommended Settings for Everyday Use
For comfortable, accurate everyday use: Screen mode Natural, white balance slightly warm of neutral (accommodating typical indoor lighting without full Adaptive color tone), Adaptive brightness on, resolution QHD+, Eye comfort shield scheduled for evenings, Vision Booster on automatic for outdoor trips. This configuration balances accuracy and comfort for the majority of daily phone interaction without requiring manual adjustments throughout the day.
Recommended Settings for Photography, Gaming, and Video
Photography review and editing: Natural mode, manual brightness 70%, Adaptive color tone off, Vision Booster off, HDR video on, QHD+, Eye comfort shield off. Gaming: Vivid mode, FHD+ for maximum performance headroom, Touch sensitivity matched to screen protector status, Game Booster enabled for additional performance optimization. Video streaming: Video screen mode for DCI-P3 motion optimization, HDR10+ on, Adaptive brightness on, Vision Booster off indoors or on auto outdoors.
Common Samsung S23 Ultra Screen Calibration Problems and Fixes
The most common Samsung S23 Ultra screen calibration problems are yellow tint after an update (fix: increase white balance toward Cool in Advanced settings), washed-out colors after a screen replacement (fix: recalibrate screen mode and RGB values for the new panel), and display inconsistency with changing lighting (fix: disable Adaptive color tone for consistent rendering). Each problem has a specific cause and a targeted fix rather than requiring a full device reset.
Understanding the pattern of which problems occur in which circumstances dramatically shortens troubleshooting time. Update-related problems are almost always settings regressions — a specific setting that was reset. Repair-related problems involve hardware-software calibration gaps. General inconsistency problems involve adaptive features behaving exactly as designed in ways that conflict with the user’s expectations.
Yellow Tint After Update — Cause and Fix
A yellow or warm tint appearing after a software update is one of the most consistently reported S23 Ultra display complaints. The cause is almost always one of three things: Eye comfort shield was enabled by the update’s default settings change, Adaptive color tone shifted the display in response to warm indoor lighting immediately after the update, or the update reset white balance toward the Warm end of the slider. Fix in sequence: check Eye comfort shield first (Settings → Display → Eye comfort shield — disable if on), then check Adaptive color tone (disable temporarily to isolate whether it’s the cause), then check white balance under Advanced settings and shift toward Cool if needed.
Washed Out Colors After Screen Replacement — Cause and Fix
Washed-out or desaturated colors after a screen replacement indicate a calibration mismatch between the replacement panel’s color characteristics and the S23 Ultra’s stored calibration data. This is most common with non-OEM replacement screens whose color rendering differs from Samsung’s specification. Start by verifying the screen mode is set to Vivid rather than Natural — Natural’s accurate-but-moderate saturation can appear washed out to eyes accustomed to Vivid. If even Vivid appears desaturated compared to the original display, the replacement panel’s color gamut coverage may be lower than the OEM specification, which is a hardware limitation rather than a software calibration problem.
FAQs
1. How do I calibrate my Samsung S23 Ultra screen? Go to Settings → Display → Screen mode, select Natural, open Advanced settings, adjust white balance to neutral, and fine-tune with individual RGB sliders. Set resolution to QHD+ under Screen resolution. Disable Adaptive color tone and Vision Booster during calibration for consistent results.
2. What is the best screen mode for Samsung S23 Ultra? Natural mode for color accuracy and professional use. Vivid mode for entertainment, gaming, and casual use where visual impact matters more than accuracy. Photo mode for DCI-P3 cinema content and wide-gamut photography review.
3. How do I fix a yellow tint on Samsung S23 Ultra display? Go to Settings → Display → Screen mode → Advanced settings and shift the white balance slider toward Cool. Also check whether Eye comfort shield is enabled (Settings → Display → Eye comfort shield) and disable it — it shifts the display warm by design.
4. Should I use QHD+ or FHD+ on Samsung S23 Ultra? QHD+ for maximum sharpness, professional color work, and photography. FHD+ when extending battery life is the priority and detail-sensitive work isn’t the main activity. Check after software updates — they frequently reset resolution to the FHD+ default.
5. What does Vision Booster do on Samsung S23 Ultra? Vision Booster enhances outdoor display visibility by increasing peak brightness toward 2200 nits and adjusting color rendering for direct sunlight legibility. It should be enabled for outdoor use and disabled indoors for accurate color rendering.
6. How do I access the Samsung S23 Ultra diagnostic menu? Dial #0# in the Phone app dialer. The hardware test menu opens immediately. Use Screen tests for display verification, Touch test for touch zone accuracy, and Sensor test for proximity and light sensor function.
7. Does Samsung S23 Ultra screen calibration affect battery life? Resolution choice affects battery most directly — QHD+ uses approximately 10-15% more power than FHD+. Vision Booster at peak brightness significantly increases power consumption. Standard color calibration adjustments (screen mode, white balance) have negligible battery impact.
8. How do I calibrate Samsung S23 Ultra for photo editing? Set Natural screen mode, disable Adaptive color tone and Vision Booster, set manual brightness to 70% in your editing environment, calibrate white balance to neutral, enable HDR video in Advanced settings, and set resolution to QHD+.
9. What is Delta E accuracy on Samsung S23 Ultra? Delta E under 2 in Natural mode — meaning color rendering is within professional accuracy thresholds. Colors displayed are close enough to their true values for most professional photography and design work to be performed confidently on this display.
10. How do I fix Samsung S23 Ultra screen after software update? Check and restore four settings updates commonly reset: Screen mode (Settings → Display), Screen resolution (QHD+), White balance (Advanced settings), and Touch sensitivity. These five minutes of verification after every major update prevent most post-update display complaints.
11. How do I calibrate Samsung S23 Ultra white balance? Go to Settings → Display → Screen mode → Advanced settings. Use the basic warm/cool slider for temperature adjustment or expand to individual Red, Green, Blue sliders for per-channel calibration. View a neutral gray reference image and adjust until no color tint is visible.
12. What is the Samsung S23 Ultra screen resolution for best display? QHD+ at 3088 × 1440 pixels for maximum sharpness at 500 ppi. This is the native resolution of the panel and produces the most accurate, sharpest display output. FHD+ at 2316 × 1080 scales down from native resolution with a subtle sharpness reduction.
13. How do I enable HDR on Samsung S23 Ultra? Go to Settings → Display → Advanced settings → HDR+ mode and toggle it on. For HDR streaming, set Screen mode to Video for optimized DCI-P3 rendering with motion processing appropriate for video content.
14. Does Eye comfort shield affect Samsung S23 Ultra calibration? Yes significantly — Eye comfort shield reduces blue channel output to warm the display, which shifts white balance toward amber and changes how all colors render. Always disable it before calibrating or doing color-sensitive work.
15. When does Samsung S23 Ultra screen need professional calibration? When display problems persist after exhausting all software calibration options — specifically when color tint doesn’t respond to any white balance adjustment, when touch consistently registers offset across the diagnostic test, or when the panel shows visible non-uniformity in the color channel tests.
Conclusion
The Samsung Galaxy S23 Ultra has one of the best displays ever shipped in a consumer device — a statement that’s easy to say and easy to underappreciate until you’ve actually calibrated it properly and seen what it’s genuinely capable of. Delta E under 2, 2200 nits peak brightness, QHD+ at 500 ppi, DCI-P3 coverage, HDR10+ certification — these aren’t marketing claims on this device, they’re achievable real-world performance when the settings are configured to let the hardware perform.
The consistent theme running through every calibration decision covered in this guide is deliberateness. Natural versus Vivid is a deliberate choice for a specific use case. QHD+ versus FHD+ is a deliberate choice balancing sharpness and battery. Adaptive color tone on or off is a deliberate decision about consistency versus comfort. Vision Booster on or off depends on where you are and what you’re doing. None of these choices are universally correct — they’re correct in specific contexts, and knowing which context you’re in determines which configuration to apply.
What makes the S23 Ultra’s display worth this calibration attention is that the effort actually changes what you get. On a mediocre display, careful calibration produces a slightly better mediocre display. On the S23 Ultra’s Dynamic AMOLED 2X panel, careful calibration unlocks performance that genuinely competes with dedicated professional monitors for most creative and professional work. That’s a meaningful difference, and it’s why this guide exists.
For the complete calibration picture beyond the display — battery, fingerprint sensor, gyroscope, compass, proximity sensor, and S Pen — our Samsung S23 calibration guide covers every component of the device with the same depth. And if your display issues are specifically tied to a software update or screen repair rather than general calibration, our spoke article on Samsung Galaxy S23 screen calibration after update or repair addresses that specific scenario in full detail.