What Is Windows Auto Color Management? (No Jargon!)
Imagine editing images that are not the same as your camera’s monitor. Frustrating, right? Windows Auto Color Management Microsoft’s solution to the chaos. It is a way to automatically transfer ICC profile (color “blueprints”) across hardware and software for you to ensure that your Netflix streaming, Photoshop projects, and Xbox games remain accurate in color.

Built-In Tools: Your Free Color Fix Kit
1. Calibrate Display Color Wizard
— What does it do It adjusts gamma the brightness, and contrast through `color.mscColor.msc.
— The best to use for quick fixes to budget monitors.
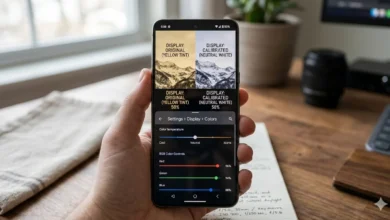
2. HDR Calibration App (Windows 11)
— What it can do It fine-tunes HDR/WCG screens to produce vibrant highlights and shadows.
– Pro Tip: Use for games like Halo Infinite or Forza Horizon 5.
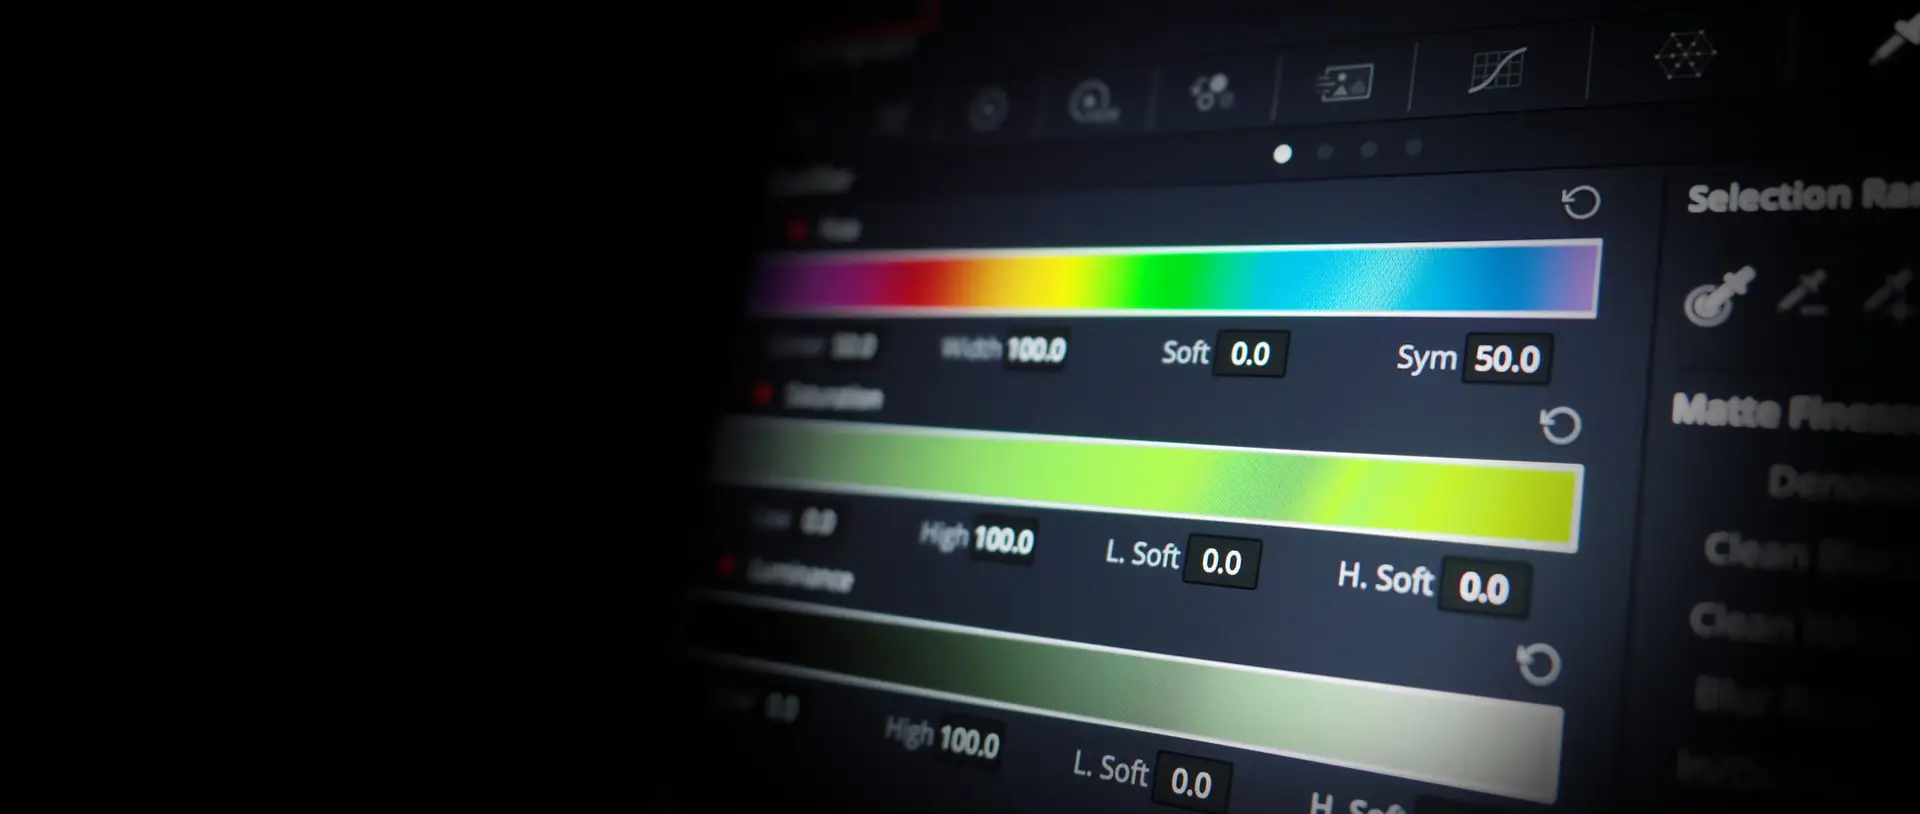
3. Color Management
• What does it do it assigns the sRGB as well as DCI-P3 profiles, and solves conflicts.
— The Hidden gem Auto Management: Deleting auto-management to prevent stubborn apps.
Windows 11 HDR Calibration: Unleash Vibrant Colors & Fix Washed-Out Screens
Got an HDR monitor but your games or movies look duller than a rainy Monday? Let’s fix that! Windows 11’s HDR Calibration App is your secret weapon for punchy highlights, inky blacks, and colors that pop. Here’s how to tame it:
Step-by-Step HDR Calibration
1. Open Settings > System > Display > HDR (yes, it’s hiding there).
2. Toggle HDR and Auto HDR – this forces games like Cyberpunk 2077 to use HDR even if they’re stubborn.
3. Launch the HDR Calibration App and drag the sliders until:
– The logo barely vanishes (brightness).
– The sun icon glows without blinding you (contrast).
– Colors look natural, not neon-barf (saturation).
Pro Tip: Use this for Dolby Vision movies too – your eyeballs will thank you.
Why Your HDR Still Looks Washed Out
– Fix 1: Disable SDR Content Brightness (it fights with HDR).
– Fix 2: Update your GPU drivers – NVIDIA/AMD drop HDR fixes like hot patches.
– Fix 3: Check your monitor’s peak brightness (needs at least 600 nits for real HDR).
HDR ≠ Always On
– For Desktop Work: Toggle HDR off (Win + Alt + B) to avoid eye strain.
– For Games/Movies: Toggle it back on – let Forza Horizon 5’s sunsets melt your soul.
Auto Vs. Manual: What One Should You Choose?
Pick Auto If…
You’re streaming HDR films or playing casually.
– Your monitor lacks wide color gamut (WCG).
Go Manual If…
– You’re a designer/photographer needing Adobe RGB precision.
If you own a professional monitor (e.g. ASUS ProArt) and you use the DisplayCAL/X-Rite i1Profiler.
Fast Fix: Stop the Colors from looking “Off”
1. Right-click on the desktop and select Display Options » Display Settings > Advanced Display.
2. Switch to HDR in the event that colors have been washed out.
3. Then, open Color Management, Advanced Options > Edit the defaults of the system > Deleting the auto ICC Profiles.
Calibrate Like a Pro: Step-by-Step Guides
Auto Calibration for HDR Monitors
1. Open Settings > System > Display > HDR.
2. Turn on HDR as well as auto HDR in games like Cyberpunk 2077..
3. Use through the HDR calibration App and drag sliders till logos disappear.
Manual Calibration for Designers
1. Make use of DisplayCAL to make Adobe DCI/RGB-P3 profiles.
2. Configure the gamma value in the range of 2.4 for HDR or 2.2 for SDR.
3. Sync profiles via Color Management (color.msc).
Pro TIP You should match the monitor’s native color spectrum (check specifications! ).
Hardware Setup: Avoid Pitfalls
HDR/WCG Monitor Must-Dos
– ASUS ProArt/BenQ SW Series: Enable Hardware Calibration in OSD.
— settings for GPUs The setting allows you to override NVIDIA/AMD presets using Windows defaults.
— 10-bit color depth: Settings > Display > Advanced > 10 bit output.
Multi-Monitor Consistency
1. Utilize an X-Rite the i1Display Pro to make sure that all screens are calibrated.
2. You can assign the the same ICC profile to all display.
3. Disable Night Light
for color-critical tasks.
Fix Annoy
Why Are My Colors Washed Out?”
— 1. 1. Disable the Auto Color Management for a short time.
– Fix 2: Reset NVIDIA Control Panel > Adjust Desktop Color Settings.
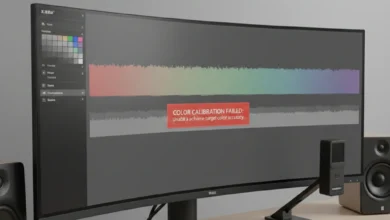
What’s This Color Banding?
— The reason Cause: low bit depth, or obsolete drivers.
— Solution the issue: enable 10 bit color and then update the GPU driver.
Advanced Workflows for Design Pros
Manual ICC Profile Mastery
Create Custom Profiles for Adobe RGB/DCI-P3
1. Utilize the DisplayCAL or the X-Rite the i1Profiler to make your monitor profiled.
2. Save the ICC file to load using the Color Management menu > Create Profile.
3. It is the default setting for programs such as Photoshop or Premiere Pro.
Fix Color Space Mismatches
— Issue: Photoshop uses Adobe RGB. However, Windows defaults to sRGB.
– Fix: Assign Adobe RGB.icc in Color Management > Advanced.
Multi-Monitor Color Consistency
Sync Profiles Across Screens
1. Make sure that all monitors are calibrated with an X-Rite I1Display Pro (rent one in case of damage).
2. Utilize DisplayFusion as well as Windows Projector Mode to use the same ICC profile.
3. Turn off the Auto Color Management to prevent Windows from dominating.
Fix Niche Issues Only Pros Notice
Why Do My Prints Look Wrong?
Reason Cause: Monitor is using DCI-P3 Printers expect to use sRGB.
– Fix: Soft-proof in Photoshop ( View > Proof Setup > Custom > Printer Profile).
HDR Makes My Desktop Look Washed Out!
— Solution Fix: Turn on Auto HDR exclusively in games ( Settings > System > Display > HDR > Auto HDR Apps).
— Pro Tips Pro Tip: Press Windows + Alt + B to turn off HDR off or on.
Night Light Ruins My Color Accuracy!
— Alternative Workaround: Schedule night light to turn off during working time.
Pro Tips to Flex Your Setup
– Gaming – Gaming: Turn on auto HDR to play Skyrim modifications It works!
– Design • Design Windows Calibration together with the Pantone certified monitors for perfect print hues.
– Future-Proof Buy a monitor with HDR 600+ accreditation as well as at least 99% Adobe RGB.
Free Tools & Scripts
1. ICC Profile Database Download profiles from the factory for Dell/ASUS/BenQ.
2. HDR Test Designs Get Free HDR test samples in 4K from the Microsoft Store.
3. Calibration Timeline Create phone reminders to have the calibration done every six months.
FAQ:
Does Windows 11 Auto HDR Work on All Games?
– A: It’s only DirectX 11/12 games are supported. Check on the Xbox Game Bar overlay to determine HDR Status.
How to Fix Color Banding in Shadows?
– A: Enable 10-bit color depth (Display Settings > Advanced > 10-bit) + update GPU drivers.
Why Does My Second Monitor Look Different?
– A panel’s age varies. Replace the panel every year or utilize the Colorimeter.
Read Also: