How Do You Use a Glucometer? | Powerful Guide
How Do You Use a Glucometer Step by Step
My First Time Using a Glucometer (And Why It Mattered)
I still remember the first time I held a glucometer. It felt like a gadget meant for doctors, not regular people like me. I was recently diagnosed with type 2 diabetes, and my doctor told me I had to start checking my blood sugar regularly. Honestly, I was nervous. How do you use a glucometer? Would it hurt? Would I do it wrong?
Turns out, it’s not as scary as it looks. In fact, once you understand the step-by-step process, using a glucose meter becomes just another small part of your daily routine — kind of like brushing your teeth. Whether you’re managing diabetes, helping a loved one, or just keeping an eye on your health, this guide will walk you through everything in simple, human language.
What Is a Glucometer and Why Do You Need One.?
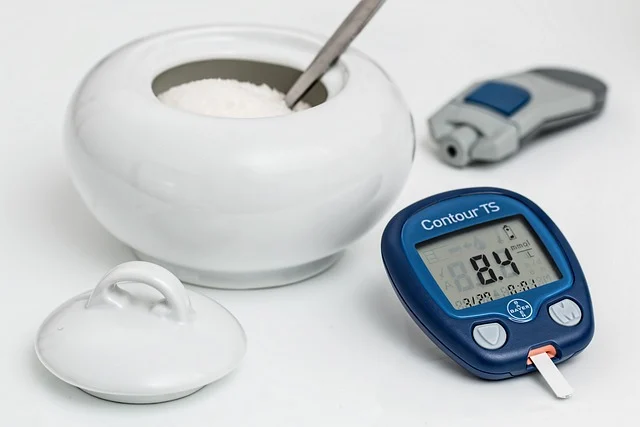
A glucometer — also called a glucose meter or blood glucose monitor — is a small electronic device that measures the amount of sugar (glucose) in your blood. It’s mostly used by people with diabetes to keep their blood sugar in check.
If you’re newly diagnosed, you might ask: Why do I need to test my sugar? Here’s the short answer — to stay in control. A glucometer gives you real-time feedback about how your body responds to food, exercise, stress, or medication. Without it, you’re guessing.
For people with type 2 diabetes, gestational diabetes, or even those at risk, this device is your best friend. And no — you don’t need to be a doctor to use it. Even seniors, kids, and complete beginners can learn how to use a glucometer at home.
How Does a Glucometer Work? (In Simple Words)
Here’s the science made simple: when you place a small drop of blood onto a test strip inserted into your glucometer, the strip reacts chemically with the glucose in your blood. The meter then calculates your blood sugar level and displays it — usually within 5 to 10 seconds.
Some devices are digital glucose monitors, others connect to your phone. Some need more blood, others just a tiny drop.
In other words:
Blood → Strip → Meter → Result.
You don’t need a lab, a nurse, or even a clinic. All it takes is a fingerstick, and you’re good to go.
Tools You Need Before Testing Blood Sugar
Before you begin, gather your gear:
- Glucometer (of course!)
- Lancet device (this pricks your finger)
- Lancets (tiny needles that go inside the device)
- Test strips (inserted into your meter)
- Alcohol swab or soap and water
- Notebook or app for recording results
- Optional: tissues or cotton ball
Make sure your test strips match your meter. Some strips are model-specific, so always check before buying. Also, keep your lancet device clean and change lancets often — hygiene matters.
If you’re helping an elderly person or a child, consider using a glucometer for seniors or those with larger screens and easier operation.
How to Use a Glucometer at Home (Step-by-Step Guide)
Now for the part you came for. Here’s how to use a glucometer at home, explained in plain English.
Step 1: Wash and dry your hands
Use warm water and soap. Dry them well — wet fingers can dilute blood and affect the reading.
Step 2: Insert a test strip
Turn on your glucometer and insert the test strip. Most devices auto-start.
Step 3: Prepare the lancet device
Load a fresh lancet into the device and adjust the depth setting if available. For beginners, a medium depth usually works.
Step 4: Prick the side of your fingertip
Avoid the middle — it’s more sensitive. Squeeze gently until a drop of blood forms.
Step 5: Touch the strip to the blood
Don’t smear. Just touch and hold the tip of the test strip to the blood drop until the meter beeps or starts analyzing.Step 6: Wait for your reading
Within a few seconds, your blood sugar level will appear on screen.
Step 7: Record the result
Log it in your diary, phone app, or share with your doctor if needed.
Step 8: Dispose safely
Toss the used lancet and strip in a sharps container or sealed bottle.
Best Time to Check Blood Sugar With a Glucometer
So, when should you test?
It depends on your condition. Here’s what most diabetes care plans suggest:
- Fasting blood sugar: First thing in the morning, before food.
- Postprandial glucose: 2 hours after meals.
- Before bed: Especially if on insulin or glucose-lowering meds.
- Before/after exercise: If you’re trying to learn how workouts affect your sugar.
For people using insulin or managing unstable blood sugar, frequent checks may be necessary.
If you’re unsure, ask your doctor: How often should I use a glucometer?
Common Glucometer Mistakes Beginners Make (And How to Avoid Them)
When I first started using my glucometer, I thought I had it figured out. But over time, I realized how small errors were affecting my results — sometimes by a lot. If you’ve ever wondered, “Why is my glucometer giving different readings?” — this might be why.
Common Mistakes:
- Not washing hands properly before testing
- Using expired test strips
- Reusing lancets (don’t do this — it dulls the needle and can cause infection)
- Squeezing your finger too hard, which mixes tissue fluid with blood
- Testing in cold fingers (blood doesn’t flow easily)
- Not inserting the strip fully or properly
- Using strips not matched to your device model
How to Fix It:
- Always start with clean, warm hands
- Store strips in a cool, dry place, away from sunlight
- Change lancets daily, not weekly
- Let blood drop form naturally, don’t force it
- Make sure your device is calibrated if required
Even the best glucometer in the world can’t give reliable results if we misuse it. Your results are only as accurate as your technique.
How to Interpret Your Glucometer Result (What the Numbers Really Mean)
Seeing a number on your screen can feel confusing. What does 104 mg/dL mean? Is it normal? Is it high? Should I worry?
Here’s a breakdown to help you understand glucometer readings:
| Testing Time | Normal Range (Non-diabetic) | Target Range (With Diabetes) |
|---|---|---|
| Fasting (morning) | 70–99 mg/dL | 80–130 mg/dL |
| 2 hrs after meals | < 140 mg/dL | < 180 mg/dL |
| Random (any time) | < 140 mg/dL | Varies, usually < 200 mg/dL |
If your number is higher or lower, don’t panic. Look at the bigger picture:
- Did you test right after eating?
- Were you stressed or unwell?
- Did you take your meds?
- Was your glucometer calibrated properly?
If you’re asking what numbers mean in glucometer, remember — one reading isn’t a diagnosis. It’s part of a pattern that helps guide your care.
Why Is My Glucometer Giving Different Readings? (Let’s Break It Down)
If you test your blood sugar twice in a row and get different numbers — you’re not alone. I’ve had moments where my glucometer said 118 one second, and 136 the next. Here’s why this happens:
Possible Causes:
- Test strip inconsistency: Even strips from the same bottle can vary slightly.
- Residual alcohol or moisture on your finger
- Testing different blood drops
- Meter tolerance: Most devices have an accuracy range of ±15%
- You tested too soon after a meal or insulin
This is why many people say, “My glucometer reading is always wrong.” But it’s usually not the device — it’s just normal variation.
If you’re seeing wildly inaccurate results, though, it may be time to:
- Change your test strip batch
- Check for expired supplies
- Or even recalibrate (and yes, that includes visiting this link if needed:
My glucometer is not working
How to Use a Glucose Meter for Beginners (Zero Experience Needed)
If you’re brand new, don’t worry — using a glucose meter doesn’t require medical training. Here’s a beginner’s guide in plain steps:
Essentials for First-Time Use:
- Choose a simple, digital glucose meter with clear instructions
- Practice using the lancet device on a low setting first
- Watch a YouTube tutorial from a trusted diabetes educator
- Do your first test when you’re calm and not rushed
- Have someone with experience guide you, if possible
The easy way to measure blood sugar levels is to stick to one device, one method, and build your routine. Within a few days, it becomes second nature.
And no — you won’t need to prick every finger. Rotate fingers and use the sides, not the pads, to reduce discomfort.
Glucometer Usage Instructions for Elderly (Comfort & Simplicity)
When helping older adults use a glucometer, simplicity and comfort matter most. My father, who’s 75 and has type 2 diabetes, found it difficult at first — small buttons, shaky hands, and forgetfulness don’t help.
What Works Best:
- Large-screen glucometers with voice prompts or bold numbers
- Pre-set lancet depth to avoid painful pricks
- Devices with auto-coding (no setup needed)
- Keeping everything in one place: meter, strips, lancets
Tips for Caregivers:
- Test at regular, calm times (e.g., before breakfast)
- Encourage recording results on a simple chart
- Watch out for signs of low or high blood sugar
- Praise and encourage independence where possible
Glucometer use for seniors isn’t just about numbers. It’s about helping them feel confident and in control — not overwhelmed.
Can I Use Glucometer Without Pricking? (Truth Revealed)
I used to ask myself this every day: Can I use a glucometer without pricking my finger? The truth is, traditional glucometers require finger pricks — that’s how you get the blood sample.
However, some modern technologies like continuous glucose monitors (CGMs) or non-invasive glucometers claim to track sugar without pricking. The problem? They’re expensive, less accurate for some people, and not a perfect replacement.
That said, you can still minimize the discomfort by:
- Using the side of the fingertip (not the pad)
- Setting the lancet depth to the shallowest needed
- Warming up your hands before testing
- Rotating fingers to avoid soreness
So while the answer is mostly no, you can make fingerstick testing almost painless with a few smart tricks.
How Much Blood Is Needed for a Glucometer?
You don’t need a lot — most modern glucometers require just 0.3 to 1.0 microliters of blood. That’s barely a dot, no larger than a pinhead.
Some people struggle with this and end up squeezing their finger too hard — which can dilute the blood with tissue fluid and lead to inaccurate readings.
To get the right drop:
- Use a new, sharp lancet
- Prick the side of the fingertip
- Gently milk the finger from base to tip (don’t squeeze the prick site)
- Use warm water or massage beforehand
If you’re worried you’re not giving enough, your glucometer will usually show a message like “apply more blood.” And no, you can’t add more later — always start fresh.
How to Test Sugar Without Pain
Let’s be honest — the fear of finger pricking is one of the biggest reasons people avoid testing. I’ve been there. But here’s the truth: testing your blood sugar doesn’t have to hurt.
Here are pain-free strategies I’ve used:
- Choose a high-quality lancet device with adjustable depth
- Start at the lowest depth and increase only if needed
- Always use the sides of your fingers (less nerves)
- Warm hands first — cold fingers hurt more
- Don’t reuse lancets — fresh needles = smoother entry
- Try alternate sites like the forearm (if your meter allows)
Over time, your fingers adapt, and the process becomes barely noticeable. I now check daily without thinking twice.
What to Do If Blood Doesn’t Come Out While Testing
It happens. You press the button, feel a slight sting, and… nothing. No blood drop. Frustrating, right?
Here’s what to do:
- First, stay calm. It’s common.
- Massage your finger from palm to tip
- Try another finger
- Make sure the lancet device is set to the correct depth
- Ensure the lancet is new — old ones might not pierce well
Also, check if your hands are cold. Warm them under water or rub them together to stimulate blood flow.
If this happens regularly, your device might need adjustment — or you may benefit from a more advanced lancing device.
How to Avoid Infection From Glucometer Use
I once got a minor finger infection from reusing a lancet (rookie mistake). Since then, I’ve made hygiene non-negotiable.
Here’s how to keep things safe:
- Always use a fresh lancet
- Wash hands before testing
- Avoid testing with dirty or sticky fingers
- Never share your glucometer or lancets
- Store supplies in a clean, dry place
- Disinfect your device weekly with alcohol wipes
Infections are rare — but preventable. Think of your glucometer as a personal medical tool, just like a toothbrush. Keep it clean, personal, and sharp.
Glucometer Use for Type 2 Diabetes
If you’re managing type 2 diabetes, glucometer use becomes part of life. It helps you know when to adjust meals, activity, or medication.
I typically test:
- Morning fasting sugar
- Before and after meals
- Before sleep (especially on insulin)
Tracking these helps me maintain glycemic control and avoid crashes or spikes.
Type 2 diabetes doesn’t mean testing 10x a day — just enough to spot patterns and make smart choices. Talk to your doctor about how often you should test based on your meds.
Glucometer Reading Is Always Wrong? Here’s Why
If you feel like your glucometer is giving inconsistent results, it might not be broken — it could be how it’s being used.
Common causes:
- Testing after washing with fruit-scented soap
- Old test strips
- Dehydration or cold fingers
- Using contaminated blood drops (touching food, lotion, etc.)
Your glucometer has a margin of error — usually ±15%. But repeated wild results mean you should recheck your technique, or possibly your meter. If needed, here’s help:
My glucometer is not working
How to Clean Your Glucometer
Cleaning your glucometer regularly keeps it accurate and safe. I wipe mine once a week, more often if I use it daily.
Steps:
- Turn off the device
- Remove strip and battery (if applicable)
- Use a soft cloth with alcohol — don’t soak
- Never submerge it in water
- Let it air dry
Do NOT clean the inside or test strip port unless your manual says it’s okay. Treat it like a sensitive device — not a dish sponge.
Can I Reuse Glucometer Strips?
Quick answer: No — never reuse glucometer strips.
Each strip has a single-use enzyme coating that reacts with your blood. Once used, it can’t give an accurate reading again. Attempting to reuse strips can give you:
- False readings
- Risk of contamination
- Misguided insulin doses
If strips are expensive, consider using a cheaper model or getting insurance-covered supplies.
Safe and Accurate Glucometer Use (Best Practices)
Want spot-on results every time? Follow these daily habits:
- Store strips in a cool, sealed container
- Wash and fully dry hands before use
- Always check expiration dates
- Use only the approved strips for your model
- Keep your device calibrated (if needed)
- Don’t test if fingers are cold or sweaty
Safe and accurate glucometer use isn’t just about getting the right number — it’s about trusting your data and managing diabetes with confidence.
FAQs:
Q. What time of day is best to check blood sugar?
Mornings (fasting), before meals, and 2 hours post-meal are ideal.
Q. Do I need to fast before using a glucometer?
Only for a fasting blood sugar test — usually after 8 hours without food.
Q. Why are my sugar readings inconsistent?
Could be due to bad technique, contaminated fingers, or expired strips.
Q. Can I use glucometer on forearm?
Yes — if your device supports alternate site testing.
Q. Is glucometer accurate for diabetes control?
Yes — when used properly, it’s accurate enough for daily management.
Q. How often should I use a glucometer?
Depends on your treatment plan. Fasting + post-meal is a good start.
Q. What should I do if my reading is high?
Recheck in 15 minutes. Drink water, walk, and follow your diabetes plan.
Q. I’m afraid of finger pricking — what can I do?
Use a gentle lancet, prick the side, and rotate fingers. It gets easier.
Q. Are digital glucose monitors better than basic ones?
They offer more features, but accuracy is similar if used correctly.
Q. How do I understand glucometer readings?
Compare them to fasting/post-meal targets and look for daily patterns.
Conclusion: You’ve Got This — Own Your Numbers
Using a glucometer for the first time can feel overwhelming — I get it. But like anything new, it gets easier with time. You don’t have to be a doctor, a tech whiz, or even “good with numbers.”
You just need to show up for yourself, test regularly, and use the info to make smarter choices. Whether you’re tracking fasting levels, checking post-meal spikes, or adjusting your insulin — this tiny device is your personal diabetes detective.
And remember, you’re not alone. Millions of people use glucometers every day — quietly, confidently, and with purpose. You can too.
Sbari