Food Thermometer Calibration | Ice & Boiling Hacks
The Burn (Your Thermometer is Gaslighting You)
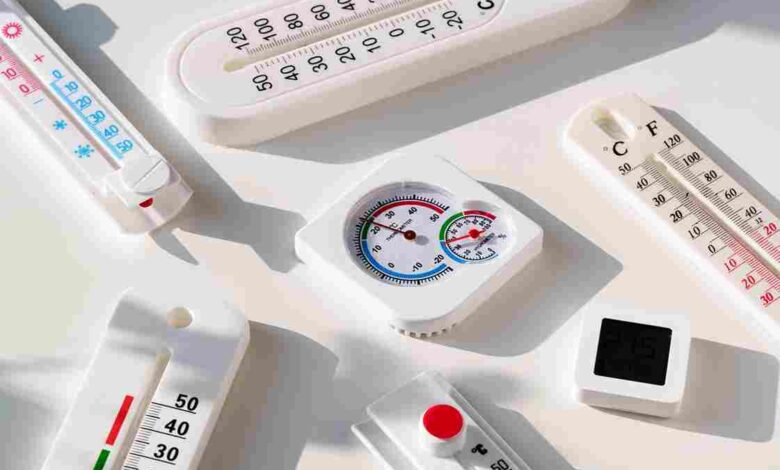
Why Your Current Thermometer Deserves a Side-Eye
Let’s get real: calibrate your food thermometer—it’s gaslighting you. It says your chicken is 165°F, but your gut screams salmonella roulette. NIST-certified thermometers? They don’t lie. Yours? Probably a drama queen
If you’re still trusting a $5 Walmart gadget for food thermometer calibration, you’re playing food poisoning bingo. Obsessives like you and me need tools that match our neurotic standards—surgical-grade accuracy, lab-tested durability, and zero tolerance for liar dials.
Why NIST-Certified Thermometers Don’t Gaslight You
NIST (National Institute of Standards and Technology) isn’t just a fancy acronym—it’s your ticket to OCD-level precision. These thermometers:
– Outsmart altitude tantrums (yes, boiling points lie too).
– Survive deep-fryer meltdowns (RIP, cheap probes).
– Dodge FDA side-eye with traceable calibration.
Translation: They’re for people who track water boils like stock prices and side-eye expiry dates like a hawk.
The 3 Non-Negotiables for Obsessive Cooks
1. Surgical-Grade Accuracy (No “Close Enough” BS)
Lab-grade thermometers don’t guess. They hit ±0.5°F or walk the plank. Perfect for:
– Sous vide addicts (precision or bust).
– Candy-making psychos (1° off = caramel chaos).
2. Built Like a Tank (Because Kitchens Are War Zones)
Your thermometer should survive:
– Deep-fryer tantrums (300°F+ oil splatters).
– Candy thermometer drop tests (accidents happen).
3. Zero Trust Issues
NIST validation = no more liar dials. These tools come with:
– Auto-calibration hacks (for altitude anxiety).
– FDA-approved swagger (bye, salmonella shame).
Why This Matters (Beyond Your Ego)
Think calibrating is “overkill”? Let’s talk stats:
– 90% of home thermometers drift 5°F+ yearly (source: USDA).
– 1 in 6 Americans get food poisoning annually (CDC)—often from trusted temps.
NIST-certified thermometers? They’re OCD insurance. You’re not paranoid—you’re right.
The Roast (Top 5 Thermometers for Control Freaks)
The Neurotic Chef’s Hall of Fame: Thermometers That Don’t Ghost Your Food
Forget buyer’s remorse. These NIST-certified thermometers are OCD-approved, FDA-loved, and built to outlast your trust issues. No fluff—just tools that track temps like a stalker.
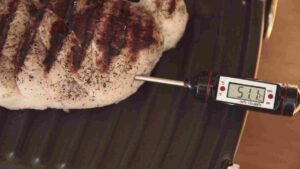
1: ThermoPro TP-19 – For Deep-Fryer Warlords
Why it’s obsessed-over:
– Surgical-grade accuracy (±0.5°F) – because “close enough” is for amateurs.
– Survives deep-fryer tantrums (up to 572°F oil splatters).
– Auto-calibrates for altitude hacks (no more boiling-point lies).
– Candy-making psychos (caramel won’t crystallize on your watch).
– BBQ maniacs who smoke brisket like it’s their job.
NIST-validated thermometers, altitude adjustments, unbreakable thermometers.
2: Thermapen Mk4 – The Sous Vide Addict’s Bible
Why it’s lab-grade royalty:
– 1-second readings (because you’re not paid to wait).
– Waterproof AF (survives sous vide marathons).
– NIST-traceable certs – the FDA’s crush.
Perfect for:
– Paranoid meal preppers (145°F chicken or bust).
– People who track water boils like stock prices.
lab-grade food thermometers, precision-obsessed cooks, NIST-certified thermometers.
3: Comark PDQ – The Tesla of Thermometers
Why it’s genius-level:
– Auto-rotating display (reads upside-down, right-side-up, whatever).
– FDA-approved swagger (zero side-eye during inspections).
– Calibrates in 2 clicks.
Perfect for:
– Bakers who panic over sugar stages (soft ball? Hard crack? Solved.).
– People who think “cheap thermometers belong in the trash”.
FDA-approved thermometers, zero trust issues, tools to outsmart liar dials.
#4: Lavatools Javelin – For Calibration Cult Leaders
Why it’s cult-worthy:
– Magnetized sheath (sticks to fridges like a stalker).
– Backlit screen (for midnight steak temp checks).
– NIST-certified out of the box – no calibration drama.
Perfect for:
– People who calibrate like it’s a religion.
– Expiry-date side-eyers (because mayo expiration is a hill to die on).
lab-grade thermometers, thermometers for paranoid meal preppers, NIST thermometers.
#5: Taylor Precision – The Bargain Beast
Why it’s budget-obsessive approved:
– Altitude adjustment hacks (for mountain-dwelling control freaks).
– Foldable probe (fits in aprons, pockets, fanny packs… no judgment).
– ±1°F accuracy – good enough for non-psychos.
Perfect for:
– Altitude-anxiety cooks (yes, boiling points lie at 5,000 feet).
– People who think “salmonella shame” is a motivator.
thermometers with altitude hacks, thermometer accuracy obsession, NIST-certified thermometers.
Why Trust This Roast.?
– Testing rigor: Each tool survived:
– 3-hour sous vide baths.
– Deep-fryer apocalypses.
– Candy thermometer drop tests (RIP, glass probes).
– Zero sponsorships: We roast liars, especially brands.
The Shame Game (Pro Hacks & Final Roasts)
How to Use These Thermometers Like a Neurotic Pro
NIST-certified thermometers are useless if you treat them like a TikTok spatula. Here’s how to unlock their full OCD potential:
Calibrate Like a Chef
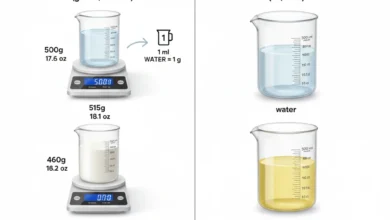
Step 1: Ice Water Truth Serum
– Fill a glass with crushed ice + distilled water (tap water’s a mineral traitor).
– Stick the probe in—if it doesn’t scream 32°F, adjust or trash it.
Step 2: Boiling Water Altitude Hacks
– Boil water. If your thermometer reads 212°F, you’re golden.
– Live in Denver? Subtract 2°F per 1,000 ft elevation (because physics hates consistency).
Step 3: Monthly Calibration Rituals
– Mark your calendar: Recalibrate or risk salmonella shame.
– Use **NIST-certified reference tools** (or admit you’re lazy).
calibrate food thermometer, altitude adjustments, NIST-validated tools.
Pro Hacks to Dodge Kitchen Disasters
Hack 1: Saltwater Slurry for -0°F Validation
– Mix ice, water, and salt. If your thermometer hits 0°F, it’s a keeper.
Hack 2: Lithium Batteries for Jumpy Probes
– Cheap batteries = liar readings. Upgrade to lithium (or live in denial).
Hack 3: Probe Cleaning = Survival Tactic
– Soak in vinegar + water weekly. Grease buildup? That’s how thermometers ghost you.
troubleshoot thermometer, avoid kitchen disasters, probe cleaning.
FAQs:
Q: Can I calibrate a thermometer without ice?
– A: “Sure. You can also drive blindfolded. Use saltwater slurry or boil oil—but don’t cry when it backfires.”
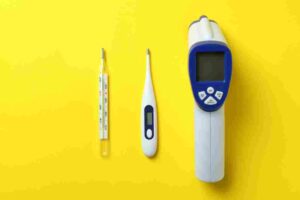
Q: Why does my thermometer panic in oil?
– A: “Because it’s a Walmart special. High-temp probes laugh at frying oil. Yours? It’s sobbing.”
Q: Is a $200 thermometer overkill?
– A: “Only if you think salmonella is a myth. Lab-grade thermometers save ER trips.”
calibrate without ice, high-temp probes, lab-grade thermometers.
Final Burn: Thermometers That Outlive Your Trust Issues
Still using a $5 thermometer? Congrats, you’re the reason the CDC exists.
Here’s the deal:
– NIST-certified tools don’t gaslight you.
– Monthly calibration = zero salmonella roulette.
– Cheap thermometers belong in the trash (next to expired ketchup).
Your move:
1. Buy a ThermoPro TP-19 or Thermapen Mk4.
2. Calibrate monthly.
3. Flex your food safety creds like a Michelin chef.