30 Best Ways | How to Use Windows HDR Calibration
What is Windows HDR Calibration and Why It Matters.?
High Dynamic Range (HDR) in Windows is designed to enhance brightness, contrast, and color accuracy, making your games, movies, and photos look dramatically more realistic. But here’s the real issue, HDR doesn’t always look good by default. If your display isn’t calibrated properly, you’ll notice washed-out blacks, blown-out highlights, or flat, dull colors. That’s why understanding how to use Windows HDR Calibration correctly is essential for anyone who wants accurate and vibrant visuals.
Windows HDR Calibration is Microsoft’s official tool that lets you fine-tune HDR by controlling clipping, peak brightness, and color saturation. Think of it as tuning a guitar before a performance, without proper calibration, your HDR visuals may look “off,” inconsistent, or worse than SDR. When you know how to use Windows HDR Calibration the right way, you unlock your monitor’s real capabilities while preventing common issues like oversaturation, crushed blacks, or faded color tones.
Why HDR Looks Bad Without Calibration
Most displays ship with default HDR settings that prioritize brightness over accuracy. Combine that with Windows’ sometimes inconsistent handling of HDR signals, and the result is poor visuals. Calibration fixes this by ensuring your monitor’s capabilities match Windows’ HDR pipeline.
Who Should Care About HDR Calibration.?
- Gamers who want immersive visuals.
- Photographers & editors needing accurate colors.
- Movie lovers who stream HDR content on Netflix, Disney+, or Blu-ray.
In short, anyone who wants their display to look like it should.
Why HDR Looks Dull or Overexposed in Windows
Many users complain: “HDR makes my screen look worse.” The main reasons:
- Windows tone mapping issues – Windows doesn’t always map HDR metadata correctly.
- Poor monitor defaults – Factory HDR modes often push brightness too high.
- Incompatible apps – Some games and apps don’t support HDR fully.
- Driver or GPU settings – Outdated graphics drivers cause HDR color mismatch.
The Real Fix for Dull HDR
The solution lies in using the Windows HDR Calibration App, updating GPU drivers, and matching your monitor’s HDR brightness curve to actual capabilities.
Pro Tip: If HDR looks “dull,” lower peak brightness in calibration and increase color saturation for balance.
How to Use the Windows HDR Calibration App (Step by Step)
Microsoft released the Windows HDR Calibration app to fix the dull HDR problem. Here’s the process:
- Download the app → Available on Microsoft Store (search “Windows HDR Calibration”).
- Launch it in HDR mode → Ensure HDR is enabled in Settings > System > Display > HDR.
- Follow the three-step test patterns:
- Minimum luminance (black level test) → Adjust until black squares blend in.
- Maximum luminance (white clipping test) → Increase until white blocks stop showing.
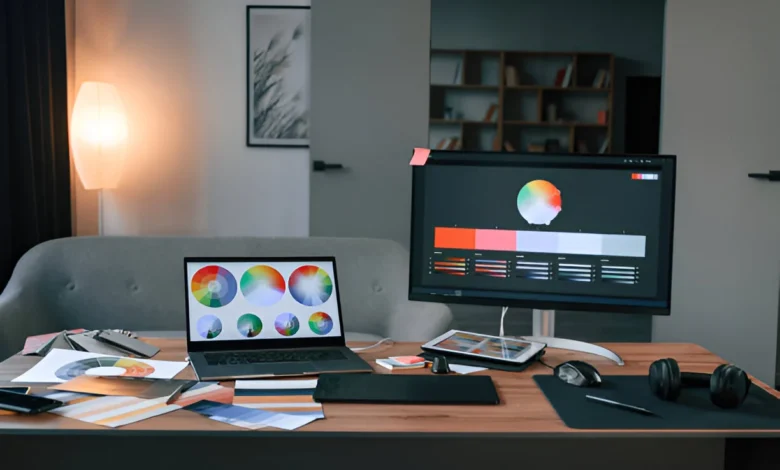
- Color saturation (chroma test) → Adjust until colors are vibrant but not oversaturated.
- Save the profile → Windows will store this calibration and apply it globally.
Why the App Is a Game Changer
Before this app, HDR calibration required third-party tools or expensive meters. Now, Microsoft gives you a free, built-in way to make HDR actually look good.
Utility Provides Fine Brightness Controls to Optimize HDR Rendering
When using Windows HDR, one of the most powerful advantages comes from the utility provides fine brightness controls to optimize HDR rendering, allowing users to refine black levels, highlight clipping, tone-mapping, and midtone balance with precision. Unlike factory HDR presets that often push brightness too high or create washed-out colors, this HDR brightness-control utility gives you granular adjustment sliders designed for dynamic luminance tuning, tone response accuracy, and real-scene contrast reproduction. These fine-tuning tools let you align Windows’ HDR output with your display’s actual luminance capability—fixing issues like dim HDR, crushed blacks, faded whites, and under-saturated colors. Using these controls ensures HDR scenes appear vivid, realistic, and correctly exposed across games, movies, and high-contrast editing tasks.
The biggest benefit of these brightness-adjustment utilities is that they apply a custom HDR rendering profile, enhancing consistency across apps and preventing the common mismatch between Windows HDR tone mapping and your monitor’s true HDR10 metadata. Whether your HDR appears “too dark,” “too bright,” “washed out,” or “flat,” these fine brightness controls help you recalibrate HDR tone mapping curves to create a visually balanced output with deeper blacks, smoother gradients, and more accurate peak luminance handling.
How Fine Brightness Controls Improve HDR Tone Mapping
HDR performance often suffers because Windows tries to map HDR content onto displays with different brightness capabilities. By using fine brightness control settings, you can manually correct this mismatch and achieve proper tone mapping. The utility lets you fine-tune:
- Shadow detail levels → prevents crushed blacks
- Midtone balance → keeps skin tones and scenery natural
- Peak luminance highlights → fixes overexposed whites
- HDR dynamic range curve → controls how brightness transitions appear
These micro-adjustments ensure your HDR image retains accurate contrast, correct luminance, and cinematic highlight detail. Gamers particularly benefit because scenes with explosions, neon lighting, and dark environments look dramatically more natural after recalibration.
Best Practices for Using Fine Brightness Controls
To get the most accurate HDR output, use these brightness controls with a structured testing approach:
- Start with black level tuning
Lower minimum luminance until dark squares barely blend, avoiding gray-black haze. - Adjust peak brightness gradually
Increase until white blocks stop showing additional detail—this prevents blown-out highlights. - Balance saturation after brightness
HDR color saturation should complement your brightness curve, not overpower it. - Match utility results with monitor HDR mode
Use “HDR10,” “True HDR,” or “Filmmaker Mode,” not artificial “HDR Effect.”
Following these steps ensures calibrated HDR that looks natural across Windows desktop, games, and streaming apps.
HDR Calibration in Windows 10 vs Windows 11
HDR behaves differently in Windows 10 and Windows 11.
- Windows 10: Basic HDR toggle with poor tone mapping. Colors often looked “flat.” No native calibration tool.
- Windows 11: Adds the HDR Calibration App, Auto HDR (for SDR games), and improved HDR handling in apps.
Should You Upgrade for HDR.?
Yes, if HDR quality matters, Windows 11 is far superior. The ability to create personalized calibration profiles makes all the difference.
Fixing Washed-Out HDR Colors
One of the most common HDR complaints is washed-out colors. This usually happens because Windows mixes SDR and HDR content incorrectly.
Quick Fix Steps
- Update to the latest GPU drivers.
- Run the HDR Calibration App → Focus on color saturation.
- Disable “Night Light” or f.lux → They break HDR.
- Check HDMI/DisplayPort cable (must support HDR10 or higher).
After calibration, your reds should look deep, blues more natural, and blacks darker — no more “gray haze.”
Best HDR Settings for Gaming on Windows
Gamers benefit the most from HDR — but only if it’s set up correctly.
Settings to Check
- Enable Auto HDR in Windows 11 for SDR titles.
- Use Fullscreen Exclusive Mode for games.
- Calibrate using the HDR app, then tweak in-game HDR sliders.
- Set GPU control panel (NVIDIA/AMD) to RGB Full Range.
Games That Shine with HDR
Titles like Cyberpunk 2077, Forza Horizon 5, Halo Infinite really pop after proper calibration.
System vs Display-Level HDR Settings
When calibrating, remember there are two levels:
- System-level HDR (Windows settings) → Applies globally.
- Display-level HDR (monitor/TV settings) → Adjust brightness, local dimming, HDR modes.
The Right Balance
You need both tuned together. For example, set your monitor’s HDR mode to “True HDR” (not “HDR Effect”), then calibrate inside Windows for best results.
The Role of Drivers and Updates in HDR Calibration
Many HDR problems aren’t caused by Windows itself but by outdated GPU drivers or firmware.
H3: Update Checklist
- NVIDIA/AMD drivers → Use latest Game Ready or Adrenalin edition.
- Monitor firmware → Some displays push HDR updates via USB.
- Windows Update → HDR handling has improved with patches.
Skipping driver updates = broken HDR colors.
HDR for OLED Monitors and Displays
OLED panels offer perfect blacks and excellent HDR performance, but they need different calibration than LCDs.
OLED HDR Tips
- Reduce peak brightness slightly (to avoid burn-in).
- Keep HDR saturation moderate.
- Use “Filmmaker” or “Game HDR” mode instead of “Vivid.”
OLED + proper calibration = the most lifelike HDR you can get.
HDR Calibration Profiles and Why They Matter
Every display has different capabilities, so one HDR profile doesn’t fit all.
- You can create multiple calibration profiles (gaming, editing, movies).
- Windows applies these automatically when HDR is turned on.
The Future of HDR Profiles
Microsoft is working on per-app HDR calibration. Soon you’ll be able to set one HDR profile for gaming, another for Netflix, and a third for editing.
Advanced Guide on How to Use Windows HDR Calibration
Understanding HDR Profiles and Why They Matter for Accurate Display Calibration
High Dynamic Range (HDR) is designed to deliver deeper blacks, brighter whites, and a wider range of colors. When using Windows HDR Calibration, the system generates an HDR profile that customizes your display’s tone mapping and brightness curve. Many users underestimate the importance of saving and managing these profiles. If your HDR looks dull, washed out, or resets after a reboot, it often means the calibration profile wasn’t saved properly or conflicts with your display driver. By learning how to properly use Windows HDR calibration, including creating, deleting, or restoring profiles, you can prevent persistent issues and achieve consistent results across gaming, movies, and professional workflows.
How to Delete Windows HDR Calibration Profile Safely
Sometimes a corrupted calibration file causes washed-out HDR or persistent color issues. To fix this, open Windows Settings > Display > HDR > Calibration, and choose Delete profile. Restart your PC and recalibrate to restore accurate color mapping.
Resolving Profile Persistence Issues After Reboot
If Windows HDR resets after restart, disable auto HDR temporarily, reapply your calibration, then lock the ICC profile via Color Management.
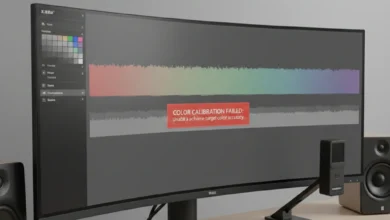
Fixing Common Problems with Windows HDR Calibration Tool Not Working
Even though Microsoft’s HDR Calibration app is reliable, users often face problems such as the app not launching, crashing during calibration, or changes not applying. These issues usually stem from outdated GPU drivers, unsupported monitors, or system-level HDR conflicts. If you’ve searched for “HDR calibration app not working” or “why is my HDR calibration grayed out,” the solution often lies in driver updates, enabling HDR in Windows settings first, or adjusting compatibility modes. Understanding these fixes will help you prevent washed-out HDR colors and improve your gaming and movie-watching experience.
Why Does HDR Calibration App Crash on Windows.?
Crashes are often linked to driver conflicts with NVIDIA Control Panel or AMD Adrenalin. Updating drivers and reinstalling the HDR app usually solves the issue.
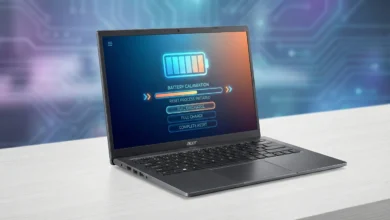
Fix HDR Flickering After Windows Update
Some Windows patches reset HDR registry values. Running calibration again and disabling “Auto HDR” resolves flickering.
How to Properly Use Windows HDR Calibration for Gaming, Movies, and Editing
Windows HDR calibration settings vary depending on your use case. For gaming, you’ll want higher peak brightness and low latency. For movies, accurate gamma curves and deep contrast are critical. For creative work like photo editing, color accuracy and ICC profile stability matter more than brightness. By tailoring your calibration to your workflow, you can solve problems like HDR looking too dark, whites appearing gray, or icons looking strange on the desktop. Understanding these differences ensures you don’t just enable HDR but optimize it for your needs.
Best HDR Calibration Settings for Gaming on Windows 11
Set peak brightness to your monitor’s specification (e.g., 1000 nits for HDR10), disable V-Sync, and enable HDR in both Windows and the game menu.
HDR Calibration for Photo Editing vs. Gaming
For editing, prioritize ICC profile accuracy. For gaming, focus on peak brightness and response time.
System-Level vs. Display-Level HDR Settings – Which One Should You Use.?
Many users wonder if they should enable HDR in Windows or just on their monitor. The truth is, both levels matter. Display-level HDR ensures your monitor’s built-in tone mapping works, while system-level HDR from Windows HDR Calibration fine-tunes gamma curves, color balance, and brightness. For OLED monitors, calibration must be handled carefully to avoid over-brightening blacks. If you’ve asked “Should I enable HDR in Windows or monitor settings?” the answer depends on your workflow. For gaming, enable both. For content creation, rely on Windows HDR calibration to maintain ICC accuracy.
Is Windows HDR Calibration Accurate for OLED Monitors.?
Yes, but OLED requires lower peak brightness targets to prevent burn-in. Always use manufacturer-recommended HDR settings before calibrating.
Registry Tweaks for HDR Metadata Override
Advanced users can adjust registry entries to lock HDR brightness values and prevent unwanted resets.
Advanced HDR Calibration Tools Beyond Windows HDR App
While the Windows HDR Calibration app is great for general users, professionals often combine it with third-party tools like CalMAN, DisplayCAL, or X-Rite colorimeters for deeper accuracy. These tools allow you to measure gamma curves, synchronize color management across applications, and generate more precise ICC profiles. If you’ve ever asked, “Is Windows HDR calibration enough?” the answer is yes for casual gaming and streaming, but no for professional video editing or color grading. Pairing Windows HDR with hardware calibrators ensures your HDR doesn’t just look good but matches industry standards like Dolby Vision or HDR10.
Using CalMAN or DisplayCAL with Windows HDR Calibration
These tools can import HDR profiles into Windows, allowing seamless switching between professional editing and gaming modes.
Control Panel & AMD Adrenalin HDR Settings
Always align GPU HDR settings with Windows calibration for consistent performance.
Frequently Asked Questions About Windows HDR Calibration
Q: Why does my HDR look washed out on Windows.?
This usually happens when HDR is enabled without proper calibration. Using the Windows HDR Calibration app allows you to adjust black levels, white balance, and peak brightness to prevent dull or faded colors. Updating your GPU driver also helps.
Q: How do I know if my HDR calibration worked.?
After saving your profile, play HDR-compatible content like a Netflix HDR movie or an HDR-enabled game. If you see richer contrast, brighter highlights, and deeper shadows without overexposure, your calibration worked.
Q: Does Windows HDR Calibration work with all monitors.?
No. Only HDR10-capable monitors or TVs are supported. If your monitor doesn’t support HDR, the calibration tool won’t launch. Always check your display’s specifications first.
Q: Why does HDR reset after every reboot in Windows 11.?
This happens when ICC profiles aren’t being stored correctly. To fix it, open Color Management, set your HDR profile as default, and disable automatic profile overrides.
Q: What’s the difference between Auto HDR and manual HDR calibration.?
Auto HDR boosts SDR content into HDR artificially, while manual HDR calibration fine-tunes native HDR output. For accurate colors, manual calibration is always better.
Q: Should I calibrate HDR separately for games and movies.?
Yes. Games often need higher peak brightness and faster response, while movies require smoother tone mapping and deeper blacks for a cinematic effect.
Q: Does HDR calibration affect SDR content.?
No. SDR remains unchanged unless Auto HDR is enabled. Calibration only affects HDR content and HDR-enabled applications.
Q: How do I fix HDR flickering on Windows.?
HDR flickering often comes from GPU driver mismatches. Update your driver, disable Auto HDR, and re-run the calibration tool to stabilize the brightness levels.
Q: Can I use third-party tools along with Windows HDR calibration.?
Yes. Tools like CalMAN, DisplayCAL, and X-Rite calibrators can enhance accuracy. You can import their profiles into Windows for even more precise results.
Q: Is Windows HDR calibration enough for professional photo or video editing.?
Not always. For casual use and gaming, it’s sufficient. But for professional color grading, you’ll need hardware calibration devices to meet industry standards like Dolby Vision.
Key Takeaways from Windows HDR Calibration
- Windows HDR Calibration ensures your HDR content looks accurate and vibrant.
- Common issues like washed-out colors, flickering, or profile resets are easily fixed with proper settings.
- Combining Windows HDR calibration with GPU settings provides the most consistent results.
- For professional use, pair it with hardware-based calibrators for maximum accuracy.
Conclusion – How to Use Windows HDR Calibration for the Best Results
Calibrating HDR in Windows isn’t just about flipping a switch—it’s about fine-tuning your system to unlock your display’s true potential. By learning how to use Windows HDR calibration step by step, you can fix washed-out colors, resolve brightness issues, and achieve consistent results across gaming, streaming, and creative workflows.
If your HDR content doesn’t look right, remember to:
- Update your GPU drivers.
- Run the Windows HDR Calibration app.
- Save and lock your ICC profiles.
- Adjust settings per use case (gaming, movies, editing).
The result.? Sharper images, brighter highlights, deeper shadows, and an HDR experience that matches your display’s full capability. With the right setup, you’ll no longer wonder “Why does my HDR look bad on Windows.?”—instead, you’ll enjoy vibrant, cinema-like visuals every time.